Table of Contents
ANPR Whitelist with IP Relay
Automate on-site responses by whitelisting licence plates to trigger IP relays for gate opening and device control.
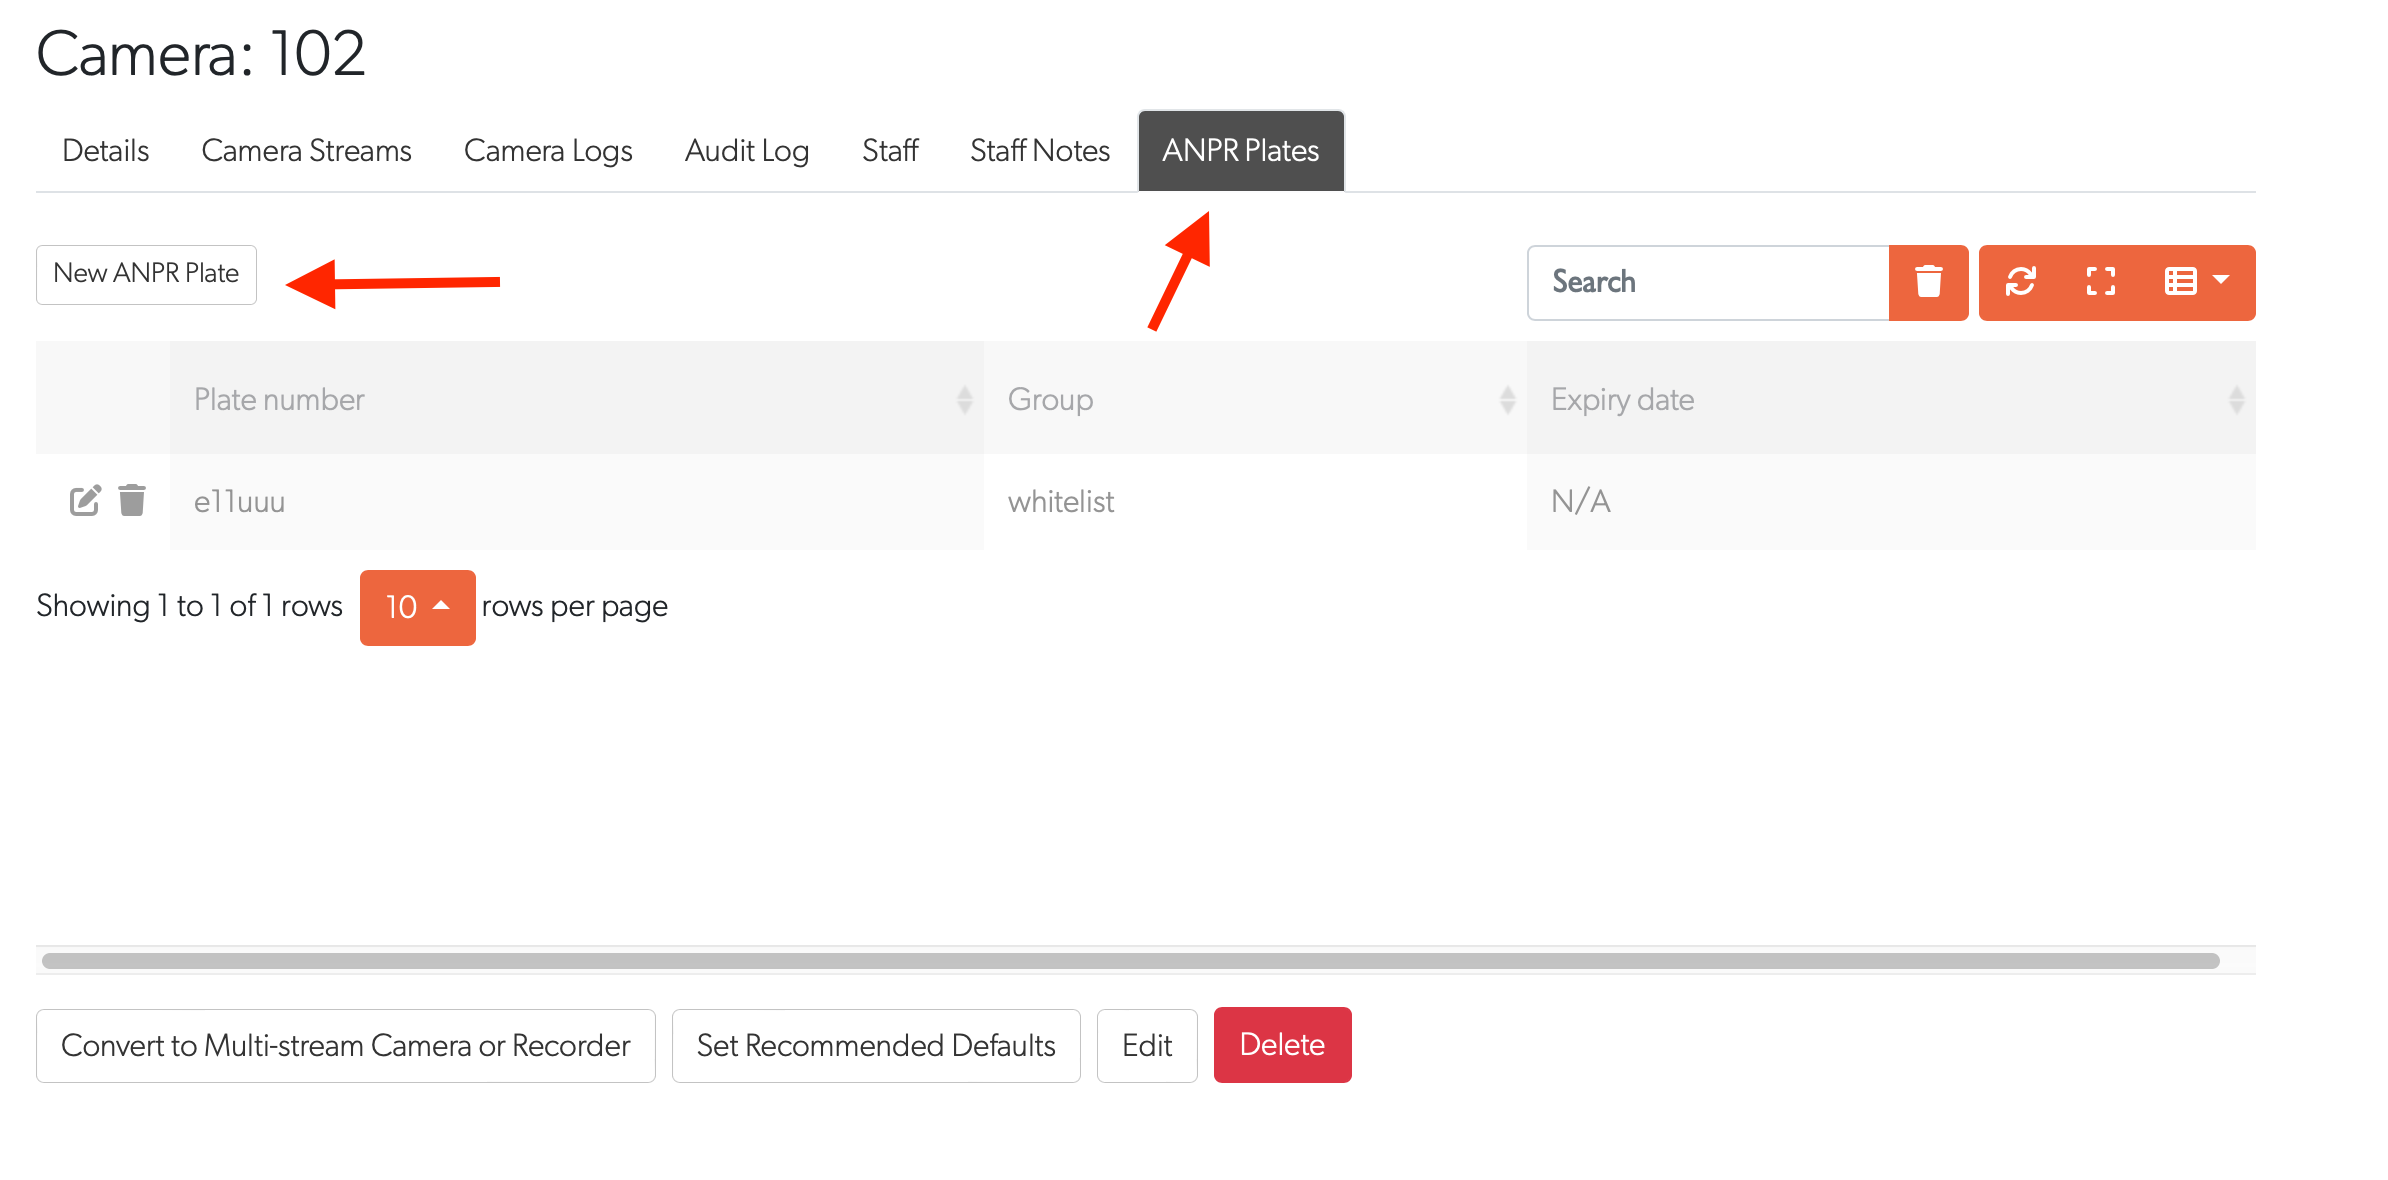
Step 1: Add Plates to Whitelist
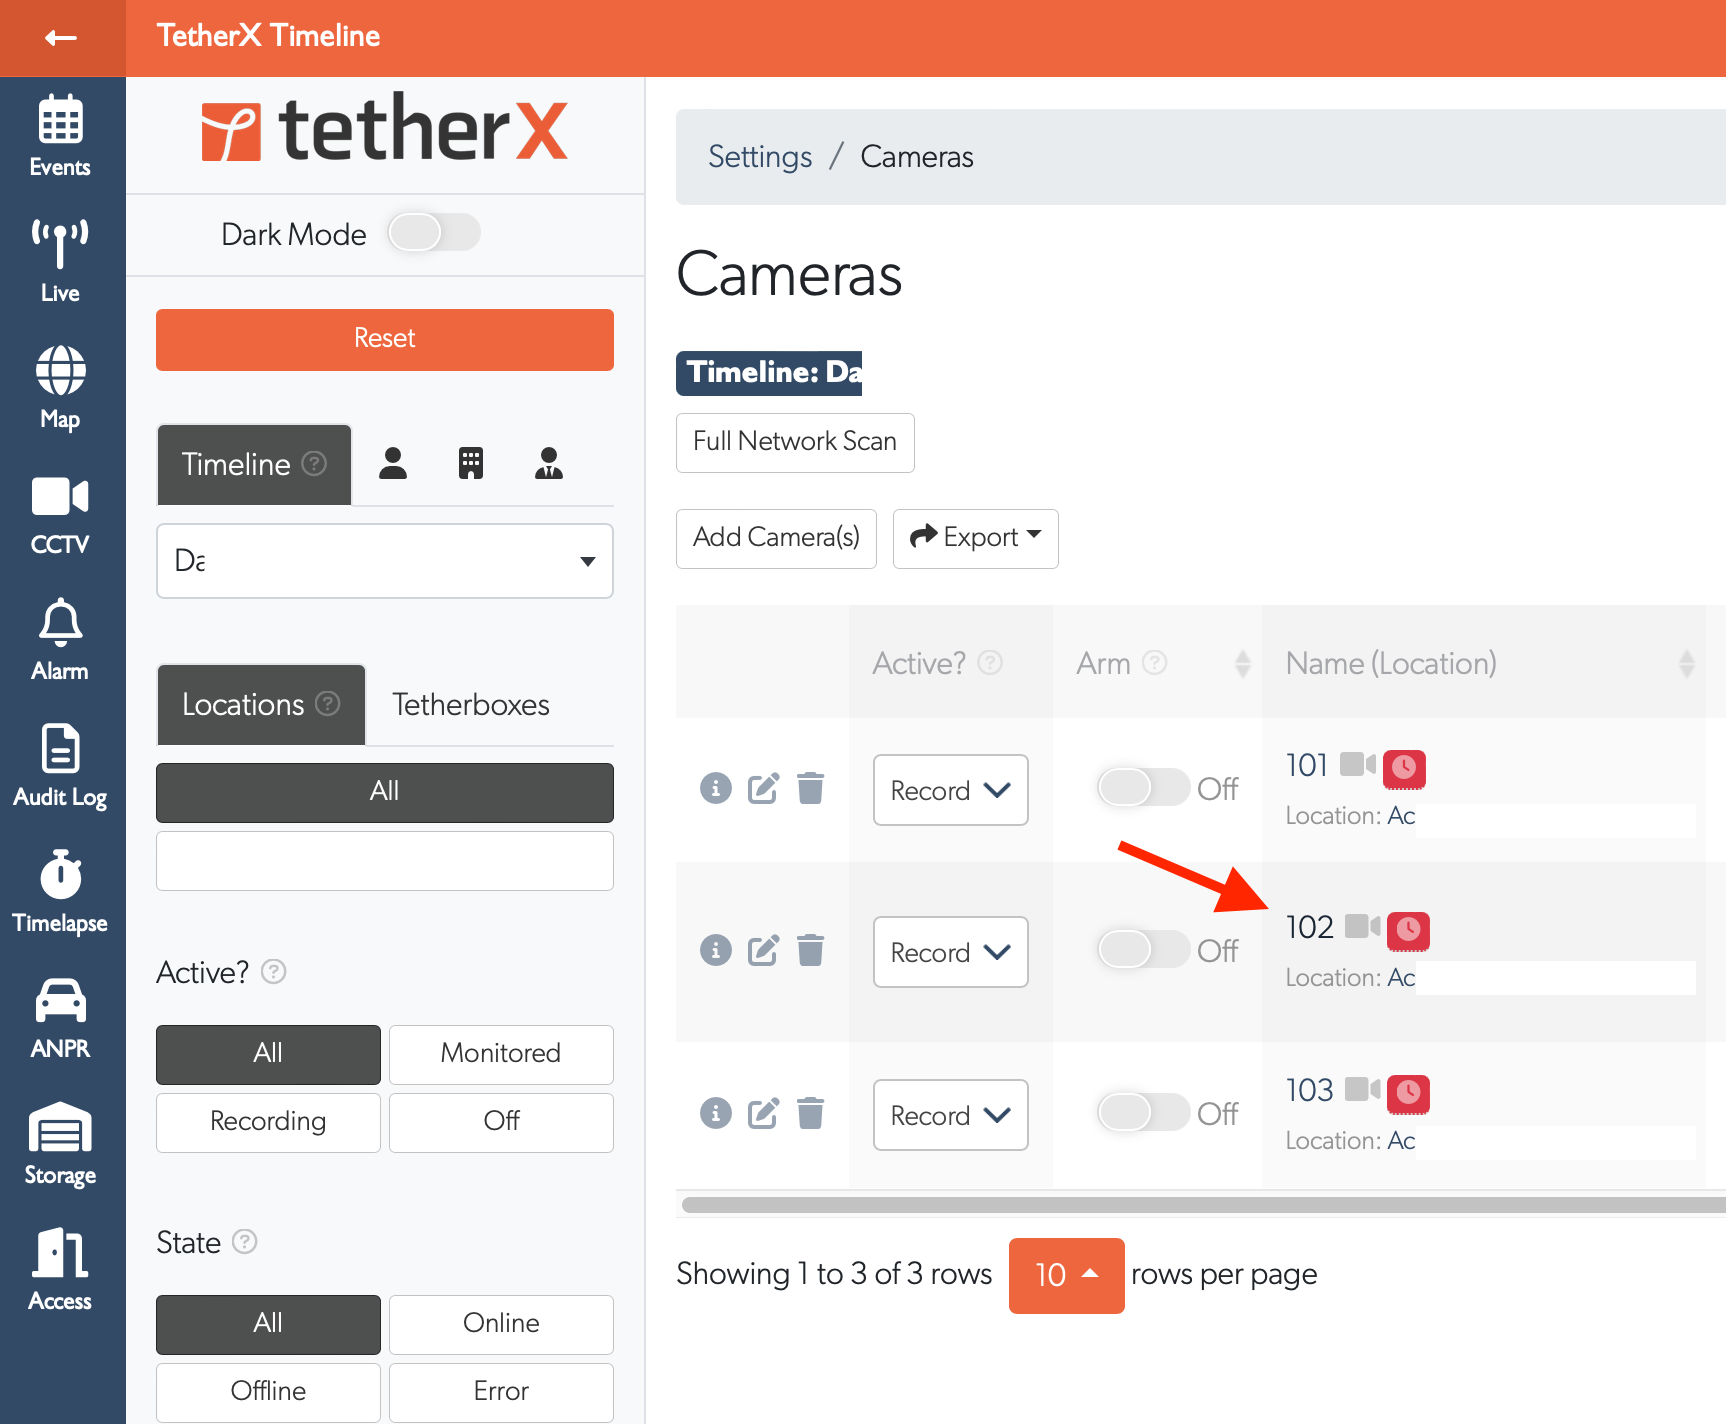
- Open the ANPR Plates tab and click New ANPR Plate
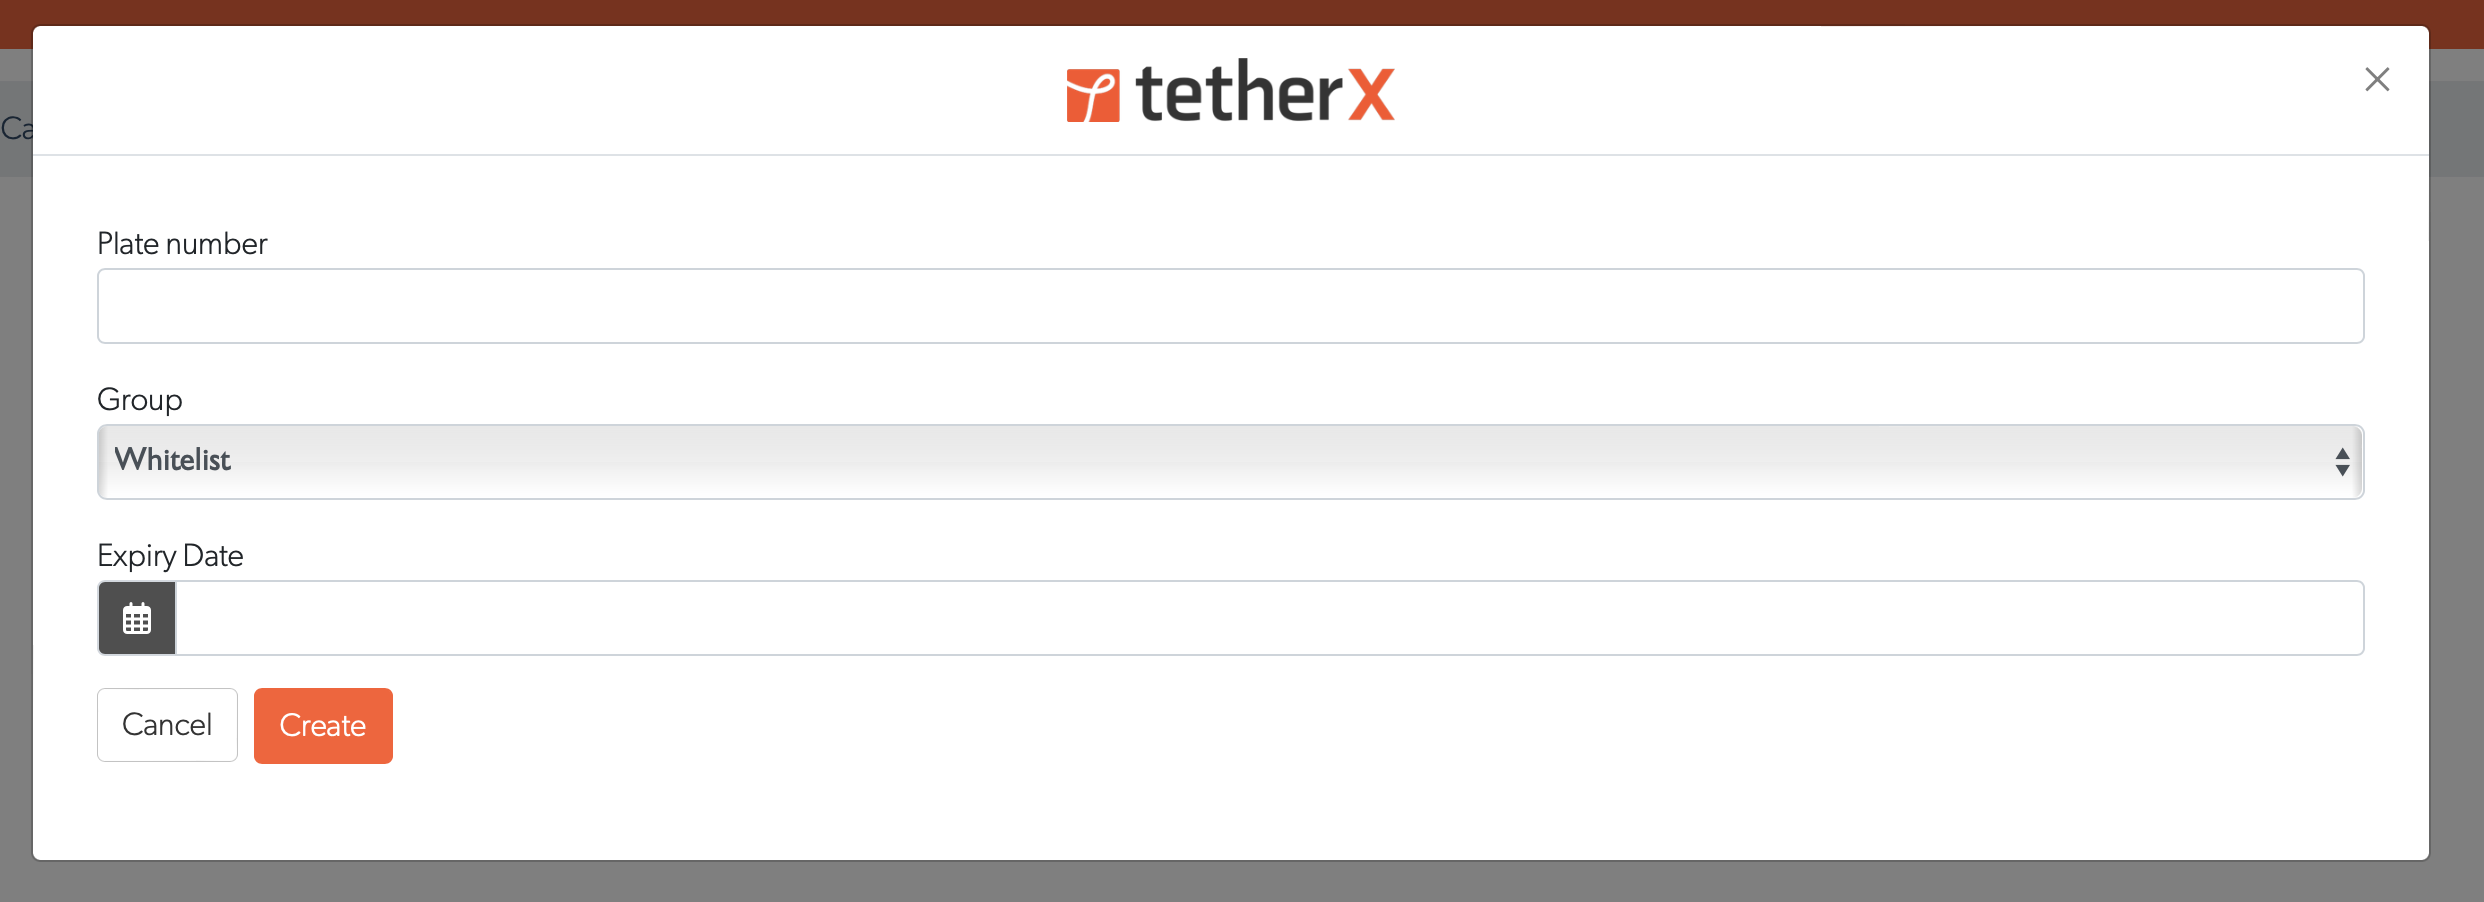
- Fill in the Add New ANPR Plate form:
- Plate Number: Enter the licence plate without spaces (e.g.,
181KE2568not181K E256 8) - Group: Select Whitelist or Blacklist
- Expiry Date: Optional - plate deactivates automatically after this date
- Plate Number: Enter the licence plate without spaces (e.g.,
Tip: Check how the camera reports the plate in Events or the ANPR export - enter it exactly the same way. The display may show spaces for readability (e.g., 181K E256 8) but the stored value has no spaces.
- Click Create to add the plate
Tip: The ANPR Plates tab only appears after your camera detects its first licence plate.
Whitelist vs Blacklist:
- Whitelisted plates trigger relay automation (e.g., open gate)
- Blacklisted plates send notifications to users but do not trigger relays
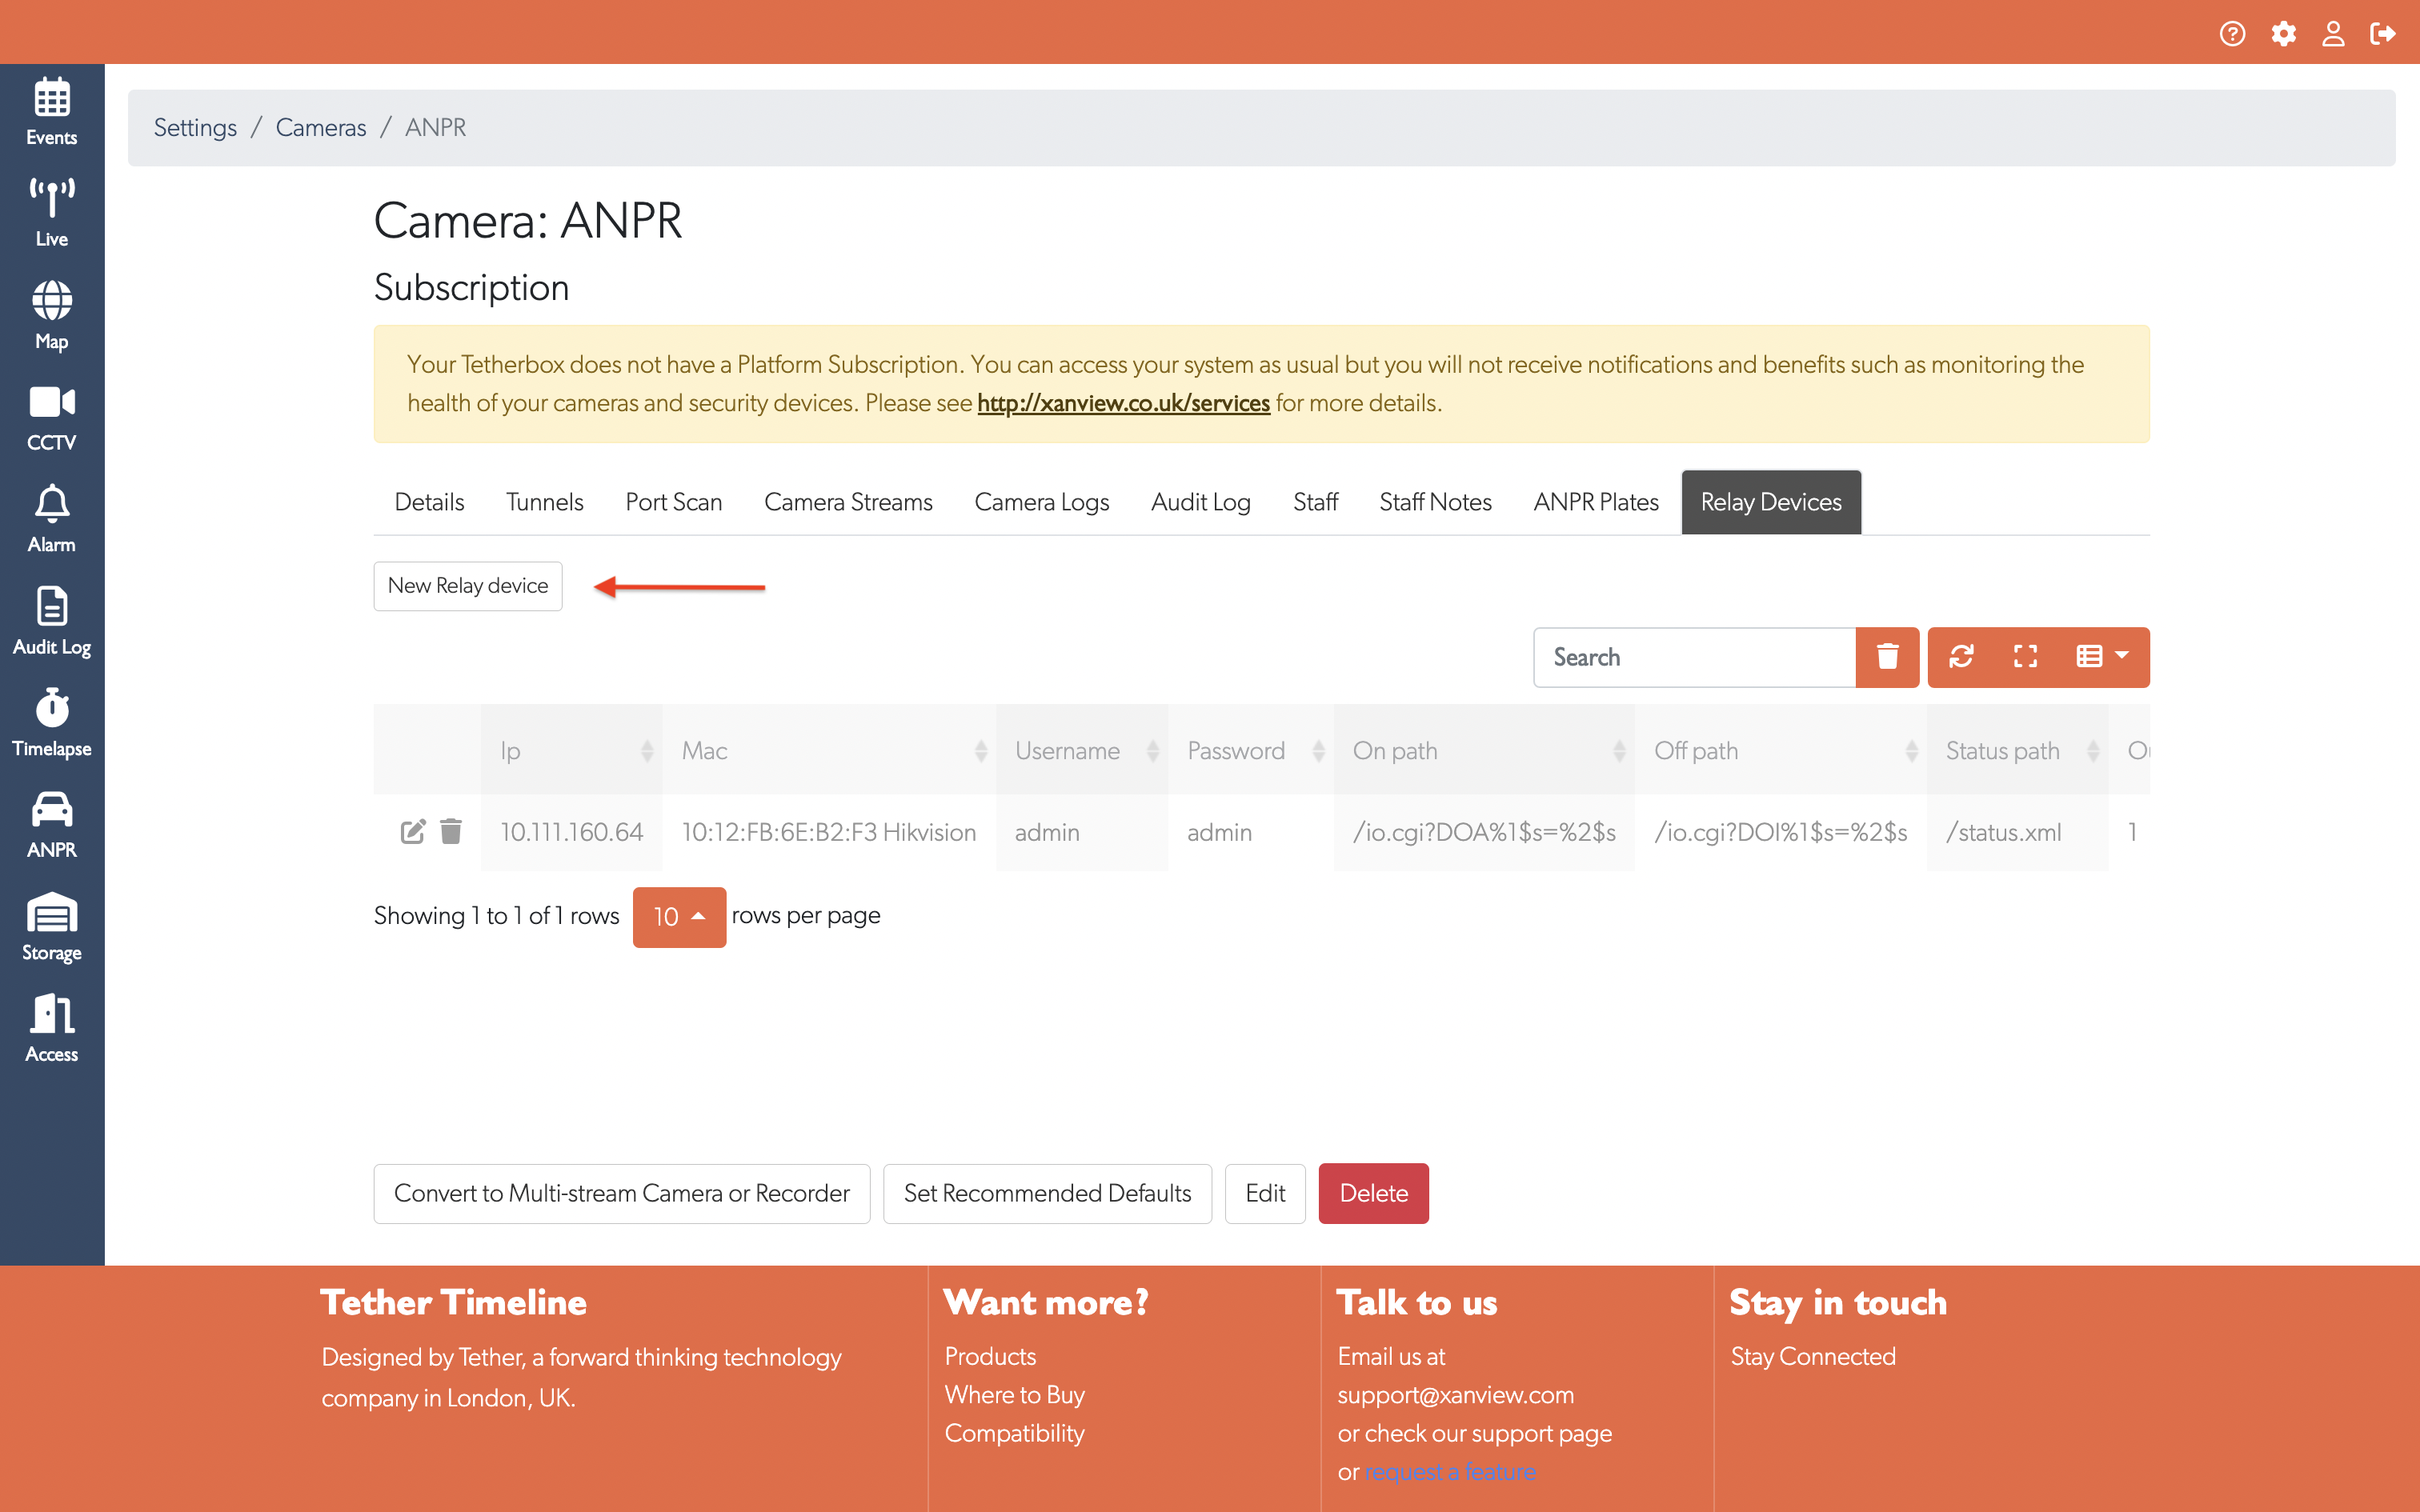
Step 2: Add a Relay Device
- Fill in the Add New Relay Device form:
- Device: Select the IP relay device from your Devices list
- Username/Password: Credentials to access the relay device
- On Path: HTTP path to activate relay (see path format below)
- Off Path: HTTP path to deactivate relay (see path format below)
- Status Path: HTTP path to check relay status
- Outputs Number: Number of relay channels available on the device
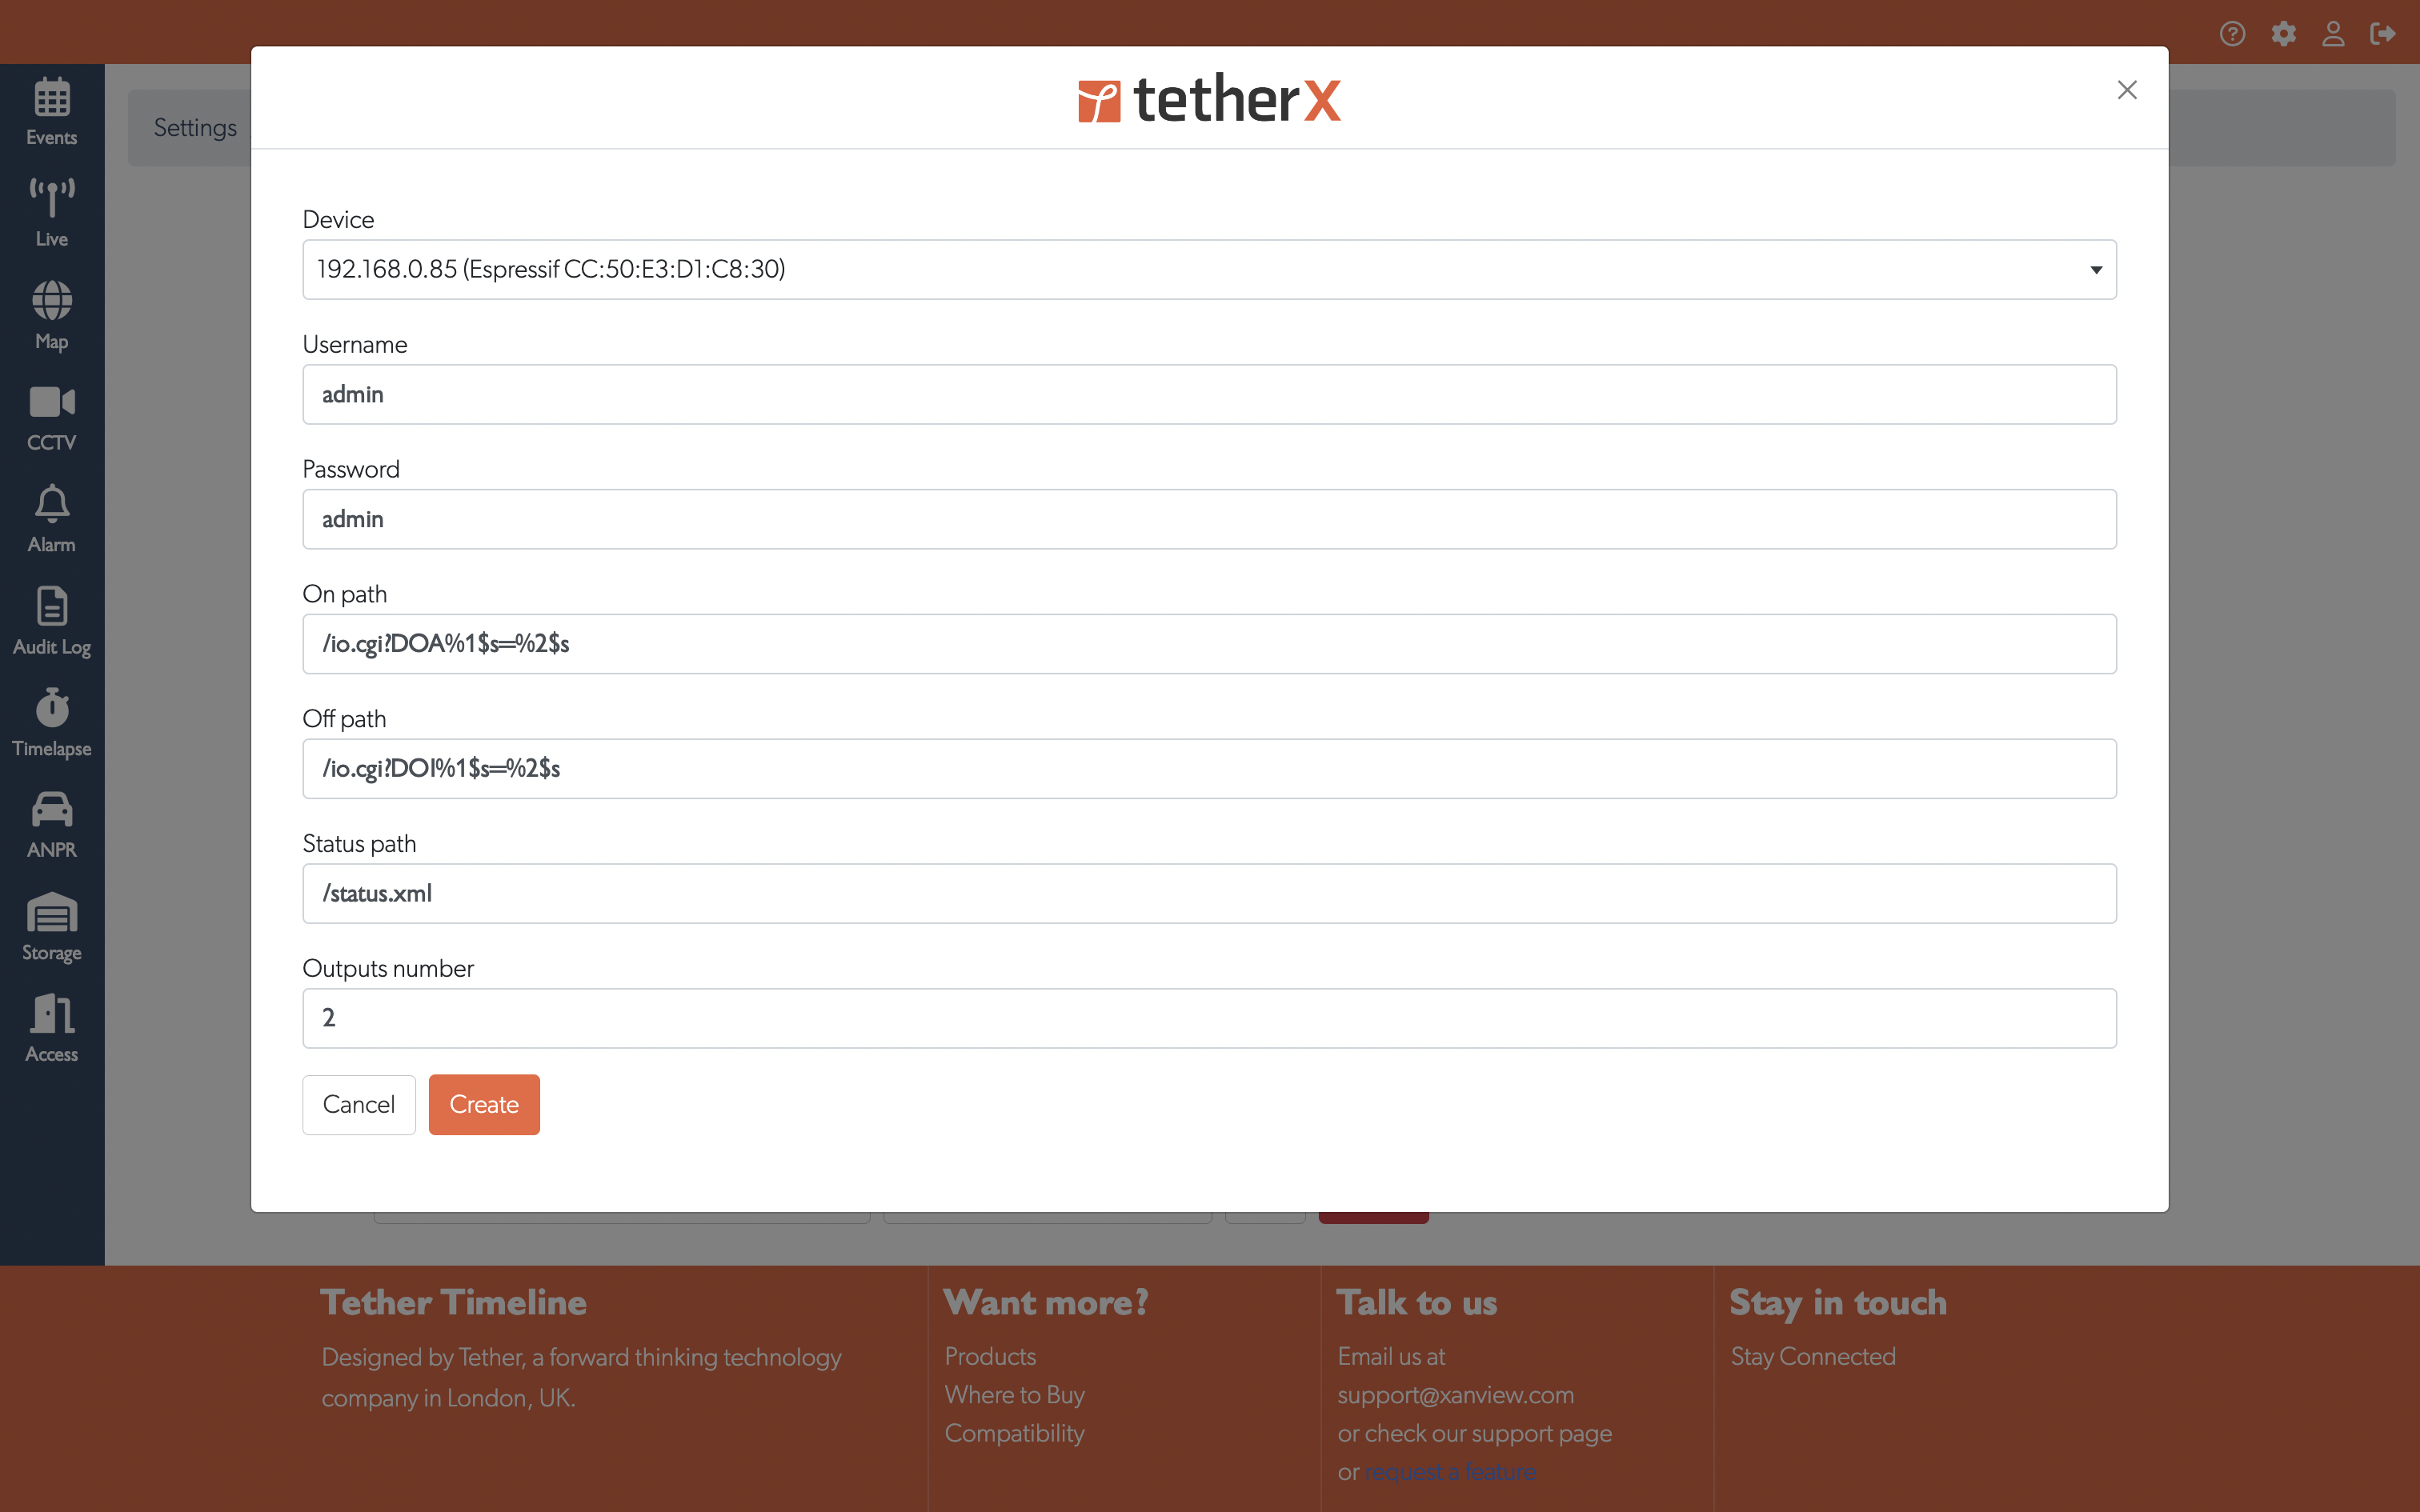
- Click Create to add the relay device
Understanding Relay Path Format
There is no universal standard for IP relay control - each manufacturer uses their own HTTP protocol. The defaults use the Robot Electronics protocol (ETH002, ETH008, ETH484 series):
- On Path:
/io.cgi?DOA%1$s=%2$s- DOA = Digital Output Active - Off Path:
/io.cgi?DOI%1$s=%2$s- DOI = Digital Output Inactive - Status Path:
/status.xml
The %1$s and %2$s are placeholders that TetherX replaces automatically:
%1$s= Output channel number (1, 2, 3, etc.)%2$s= Duration in 100ms increments (10 = 1 second, 30 = 3 seconds, 0 = permanent)
Testing Your Relay Device
Before configuring automation, test your relay directly by entering these URLs in your browser (replace 192.168.1.100 with your relay's IP):
| Manufacturer | Test ON | Test OFF | TetherX On Path | TetherX Off Path |
|---|---|---|---|---|
| ControlByWeb (recommended) | /state.xml?relay1State=1 |
/state.xml?relay1State=0 |
/state.xml?relay%1$sState=1 |
/state.xml?relay%1$sState=0 |
| Robot Electronics | /io.cgi?DOA1=30 |
/io.cgi?DOI1=0 |
/io.cgi?DOA%1$s=%2$s |
/io.cgi?DOI%1$s=%2$s |
| KMtronic | /relays.cgi?relay=1 |
/relays.cgi?relay=1 |
/relays.cgi?relay=%1$s |
/relays.cgi?relay=%1$s |
| Denkovi | /current_state.xml?relay1=1 |
/current_state.xml?relay1=0 |
/current_state.xml?relay%1$s=1 |
/current_state.xml?relay%1$s=0 |
| Moxa ioLogik | /api/slot/0/io/relay |
/api/slot/0/io/relay |
/api/slot/0/io/relay |
/api/slot/0/io/relay |
| Generic REST | /relay/1/on |
/relay/1/off |
/relay/%1$s/on |
/relay/%1$s/off |
Warning: Hikvision ISAPI requires PUT requests with XML body (<outputState>high</outputState> for on, <outputState>low</outputState> for off) which is not compatible with simple HTTP GET paths. Use a dedicated IP relay board instead.
Tip: If your relay uses a different protocol, consult your device manual for the correct HTTP paths and adjust accordingly.
Step 3: Link Camera to Relay Device
After creating a relay device, configure your camera to use it:
In the same Relay Devices tab, scroll to Camera Relay Configuration
Configure the following settings:
- Relay Device: Select which relay device this camera should control
- Output Number: Which relay output channel to use (1-based)
- Duration (seconds): How long to activate the relay (e.g., 3 seconds for a gate)
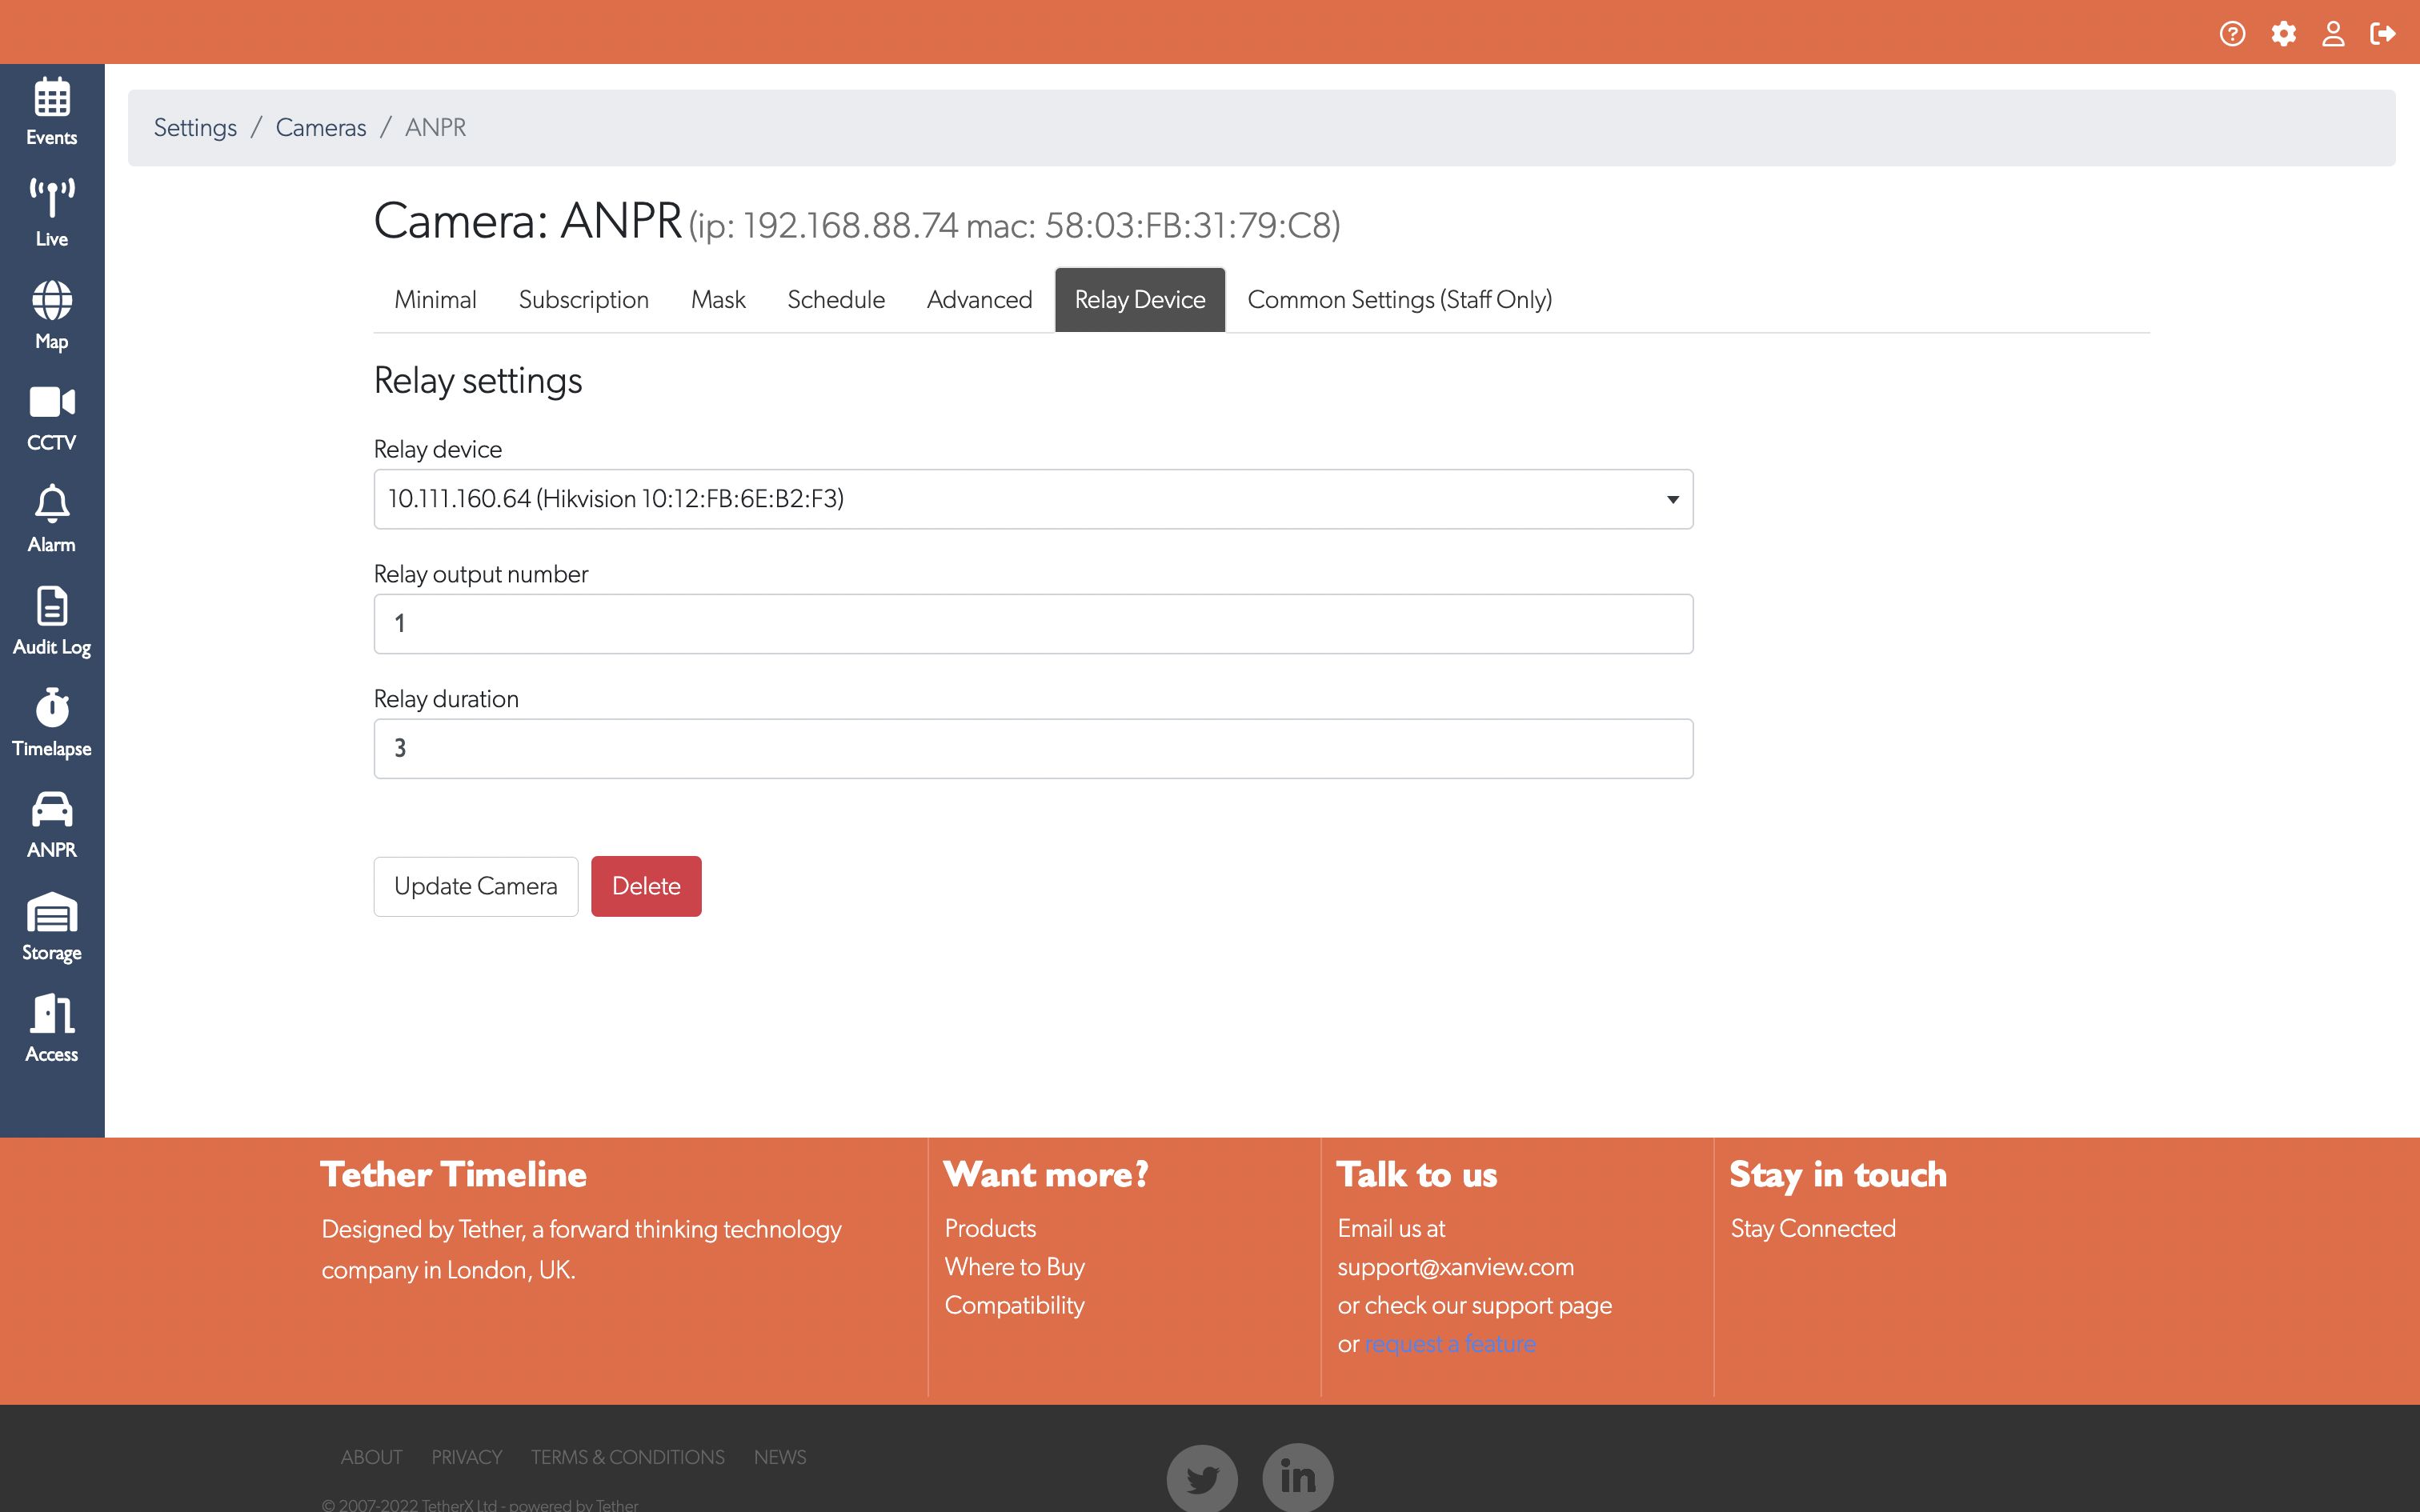
- Settings save automatically when you change them
How Automation Works
When a whitelisted plate is detected:
- Camera detects licence plate and sends it to your TetherBox
- TetherBox matches plate against the camera's whitelist
- If matched, TetherBox sends ON command to configured relay device
- Relay activates (e.g., gate opens)
- After the configured duration, TetherBox sends OFF command
- Relay deactivates (e.g., gate closes)
Troubleshooting
Barrier Not Opening for Whitelisted Plates
If the relay doesn't trigger when a whitelisted plate is detected, check the following:
1. Verify Camera Relay Configuration (most common issue)
Go to Admin → Cameras → select your camera → Relay Devices tab → scroll to Camera Relay Configuration and confirm:
- A Relay Device is selected (not "None")
- Output Number matches your relay channel
- Duration is set (e.g., 3 seconds)
Warning: If no relay device is selected in Camera Relay Configuration, the whitelist will detect plates but never trigger the barrier.
2. Check the "Last Seen" Column
In the ANPR Plates tab, the Last Seen column shows when each plate was last matched:
- Never updated = Plates are being detected but not matched to whitelist entries
- Updates but relay doesn't trigger = Whitelist matching works, but relay configuration is wrong
3. Plate Format Must Match Exactly
The plate number in your whitelist must match exactly how the camera stores it:
- Plates are stored without spaces (e.g.,
181KE2568) - The display adds spaces for readability (e.g.,
181K E256 8) but this is cosmetic only - Export your ANPR data to CSV to see the actual stored format
- Enter plates without spaces to ensure matching works
4. Check TetherBox Connectivity
Go to TetherBoxes and verify your TetherBox is online. If offline, the whitelist data cannot sync and relay commands cannot be sent.
5. Resync Plates to TetherBox
If plates appear correct in TetherX but the TetherBox isn't recognising them, use the Resync Plates button:
- Go to Admin → Cameras → select your ANPR camera → ANPR Plates tab
- Click the Resync Plates button in the top-right corner of the ANPR Plates card
- This deletes all plates stored on the TetherBox and re-sends them from the database
Use this when:
- Plates were added while the TetherBox was offline
- The TetherBox was replaced or rebuilt
- Whitelist matching isn't working despite correct configuration
6. Test the Relay Manually
In the Relay Devices tab, each relay device has test buttons in the table:
- ON - Activates the relay
- OFF - Deactivates the relay
- Pulse - Activates for 2 seconds then deactivates
If manual testing fails:
- Check relay device credentials (username/password)
- Verify the relay is on the same network as the TetherBox
- Test the relay URL directly in a browser (see path examples above)
7. Check Expiry Dates
Plates with past expiry dates are automatically ignored. Remove the expiry date or set a future date.
Adding Relay Devices via API
Relay devices can also be added programmatically using the TetherX API:
curl -X POST "https://my.timeline.is/api/v3p/relay_devices" \
  -H "Content-Type: application/json" \
  -d '{
    "username": "admin",
    "password": "admin",
    "device_id": "YOUR_DEVICE_ID",
    "outputs_number": 3
  }'
For full API documentation, see the TetherX API Reference.
Related Articles
- Setting Up ANPR Cameras - Configure ANPR on your cameras
- How to Enable ONVIF - Enable ONVIF protocol for camera discovery
- Self Storage - Plate-driven gate entry as part of an unmanned storage site