Table of Contents
Paxton Net2 Integration
Tip: Paxton Net2 is currently our only access control integration, but expanding access control support is a key focus for 2026. If you need integration with systems like CCURE, Gallagher, or others, contact us - especially if you have a live project. With vendor API access and a clear scope, new integrations typically take just a few weeks.
TetherX integrates with Paxton Net2 access control systems for monitoring, management, and automation.
Core capabilities:
- Monitoring - Real-time door events with video verification, searchable by name across multiple sites.
- Management - Unlock doors remotely and manage Net2 users within TetherX.
- Automation - Create rules such as disarming alarms when specific users enter.
Requirements
- Paxton Net2 Access Control version 6.01 or later
- Windows PC running Net2 server with network access to TetherBox
Warning: Paxton10 does not offer a third-party API, so integration is not possible.
License Setup
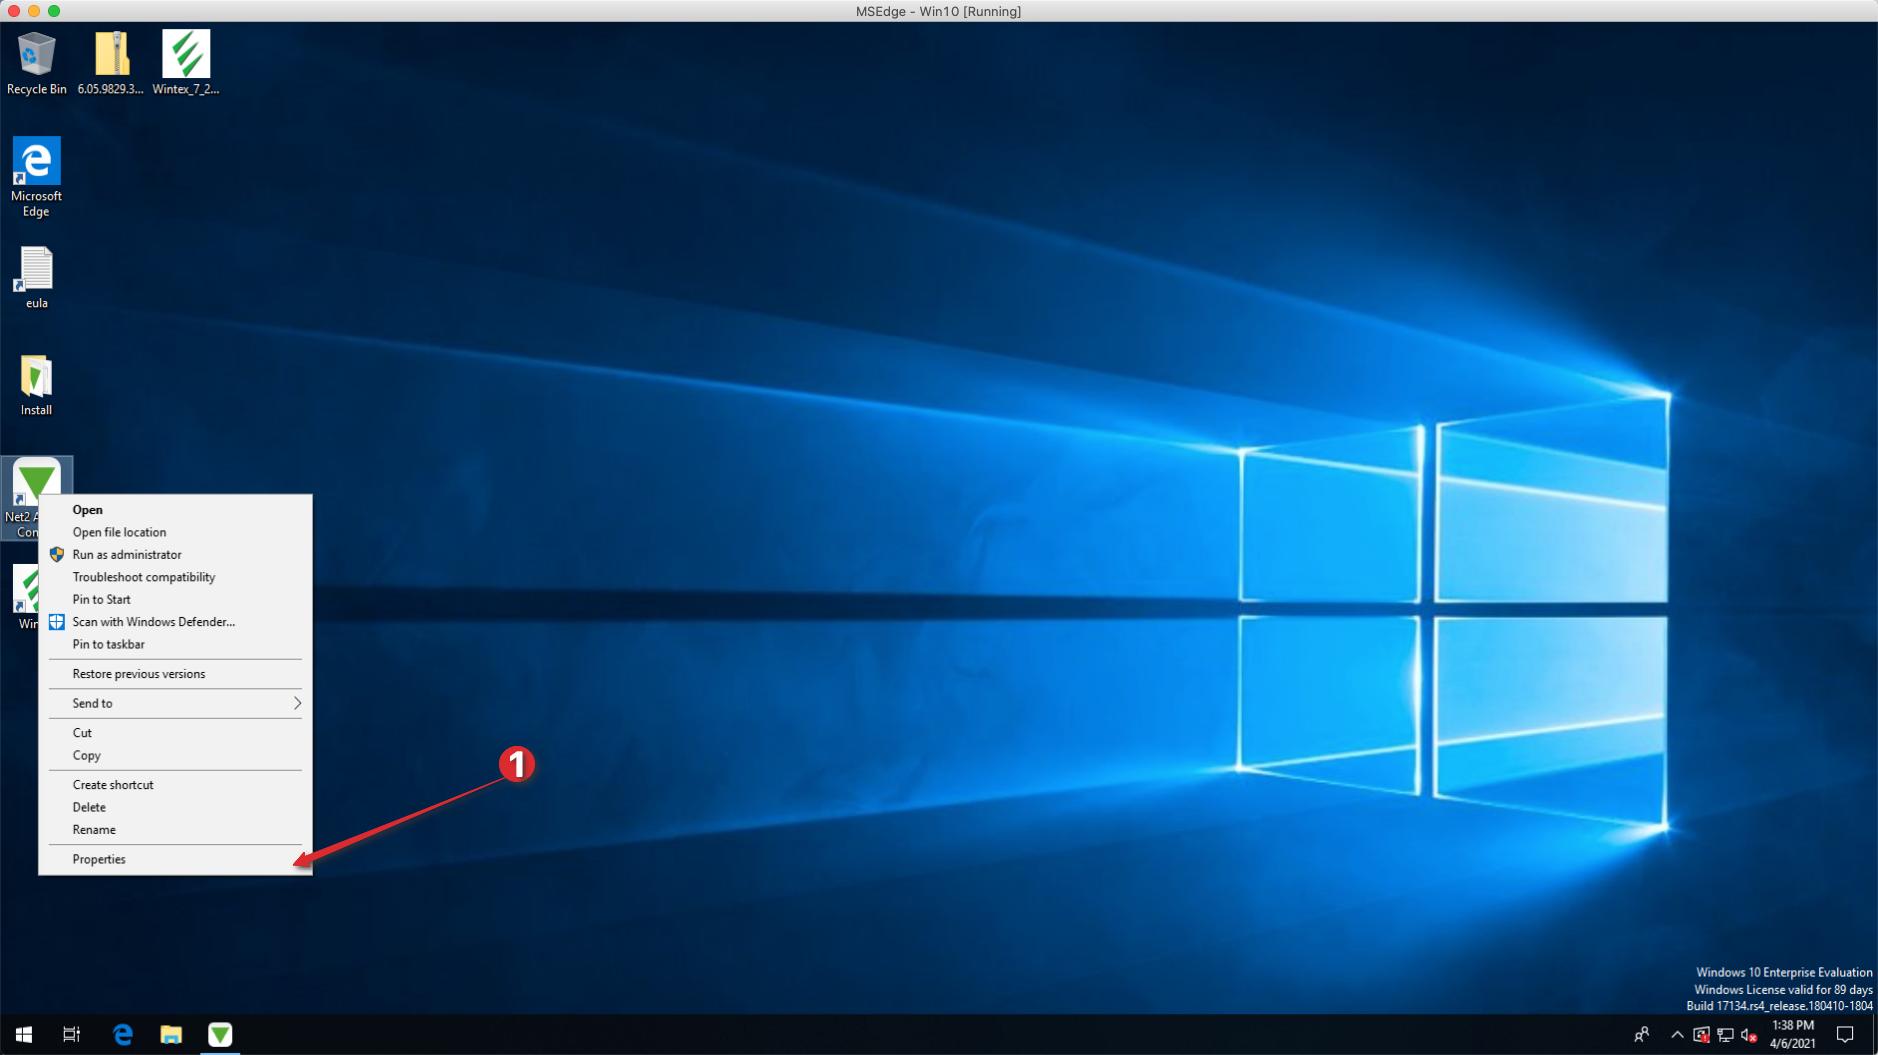
Open Paxton Properties
Right-click the Paxton Net2 shortcut and select Properties.
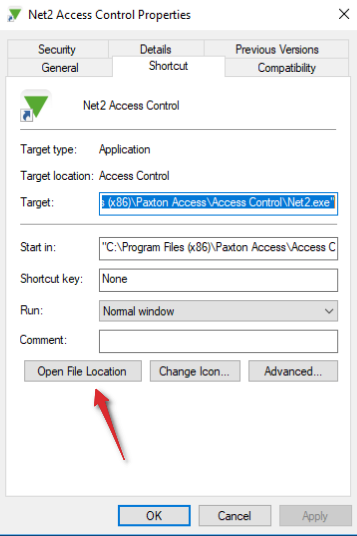
Open File Location
Click Open File Location to navigate to the installation folder.
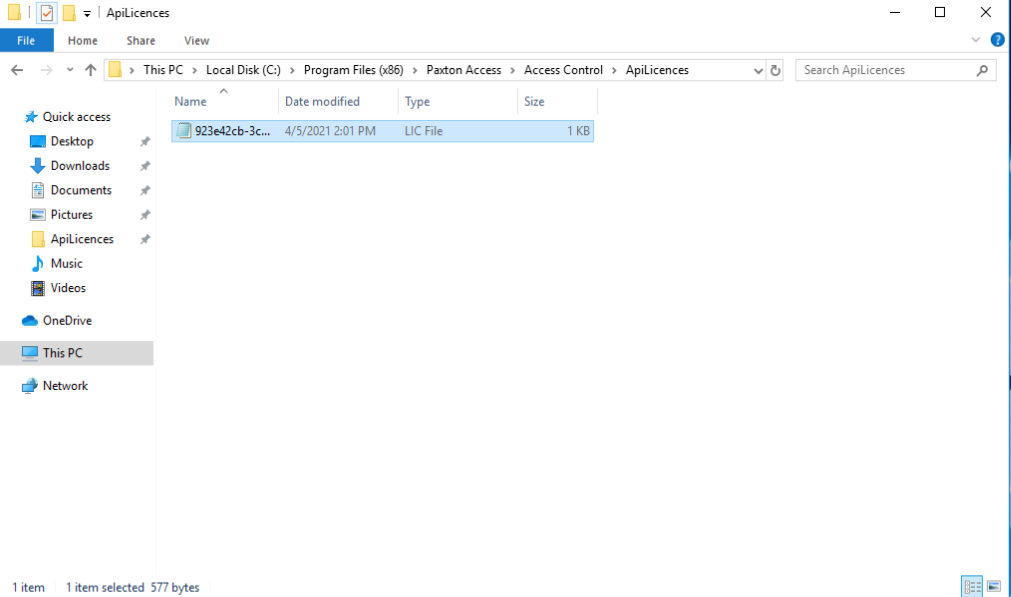
Find the ApiLicences Folder
Navigate to the ApiLicences folder inside the Access Control folder:
[INSTALL_LOCATION]\Access Control\ApiLicences
For example: C:\Program Files (x86)\Paxton Access\Access Control\ApiLicences\

Download the License File
Download the TetherX license file.
Install the License
Move the license file to the ApiLicences folder:
C:\Program Files (x86)\Paxton Access\Access Control\ApiLicences\92ebef7c-9edc-442d-bc1c-584a7acd8bca.lic
Tip: The file should be named 92ebef7c-9edc-442d-bc1c-584a7acd8bca.lic - do not rename it.
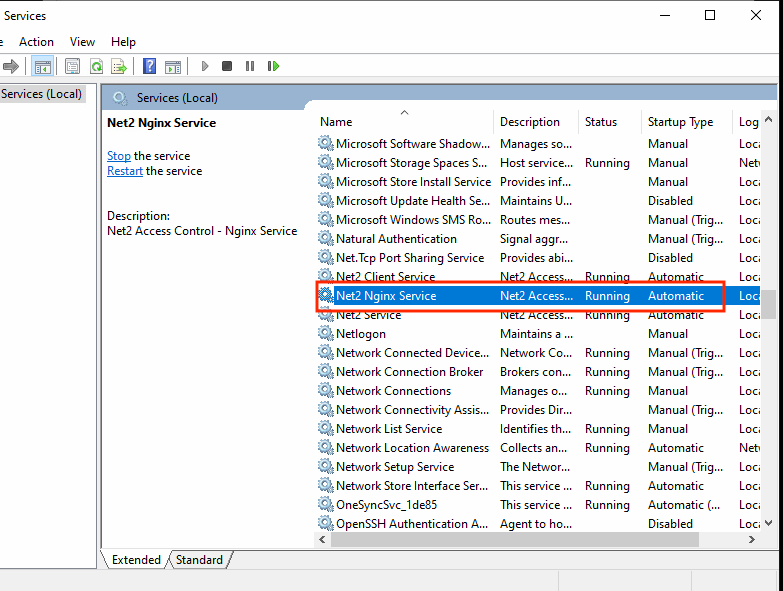
Enable nginx Service
Ensure the Net2 Nginx Service is enabled and running in Windows Services.
Restart Net2 Server
Restart the Net2 server for the license to take effect.
Adding Paxton Net2 to TetherX
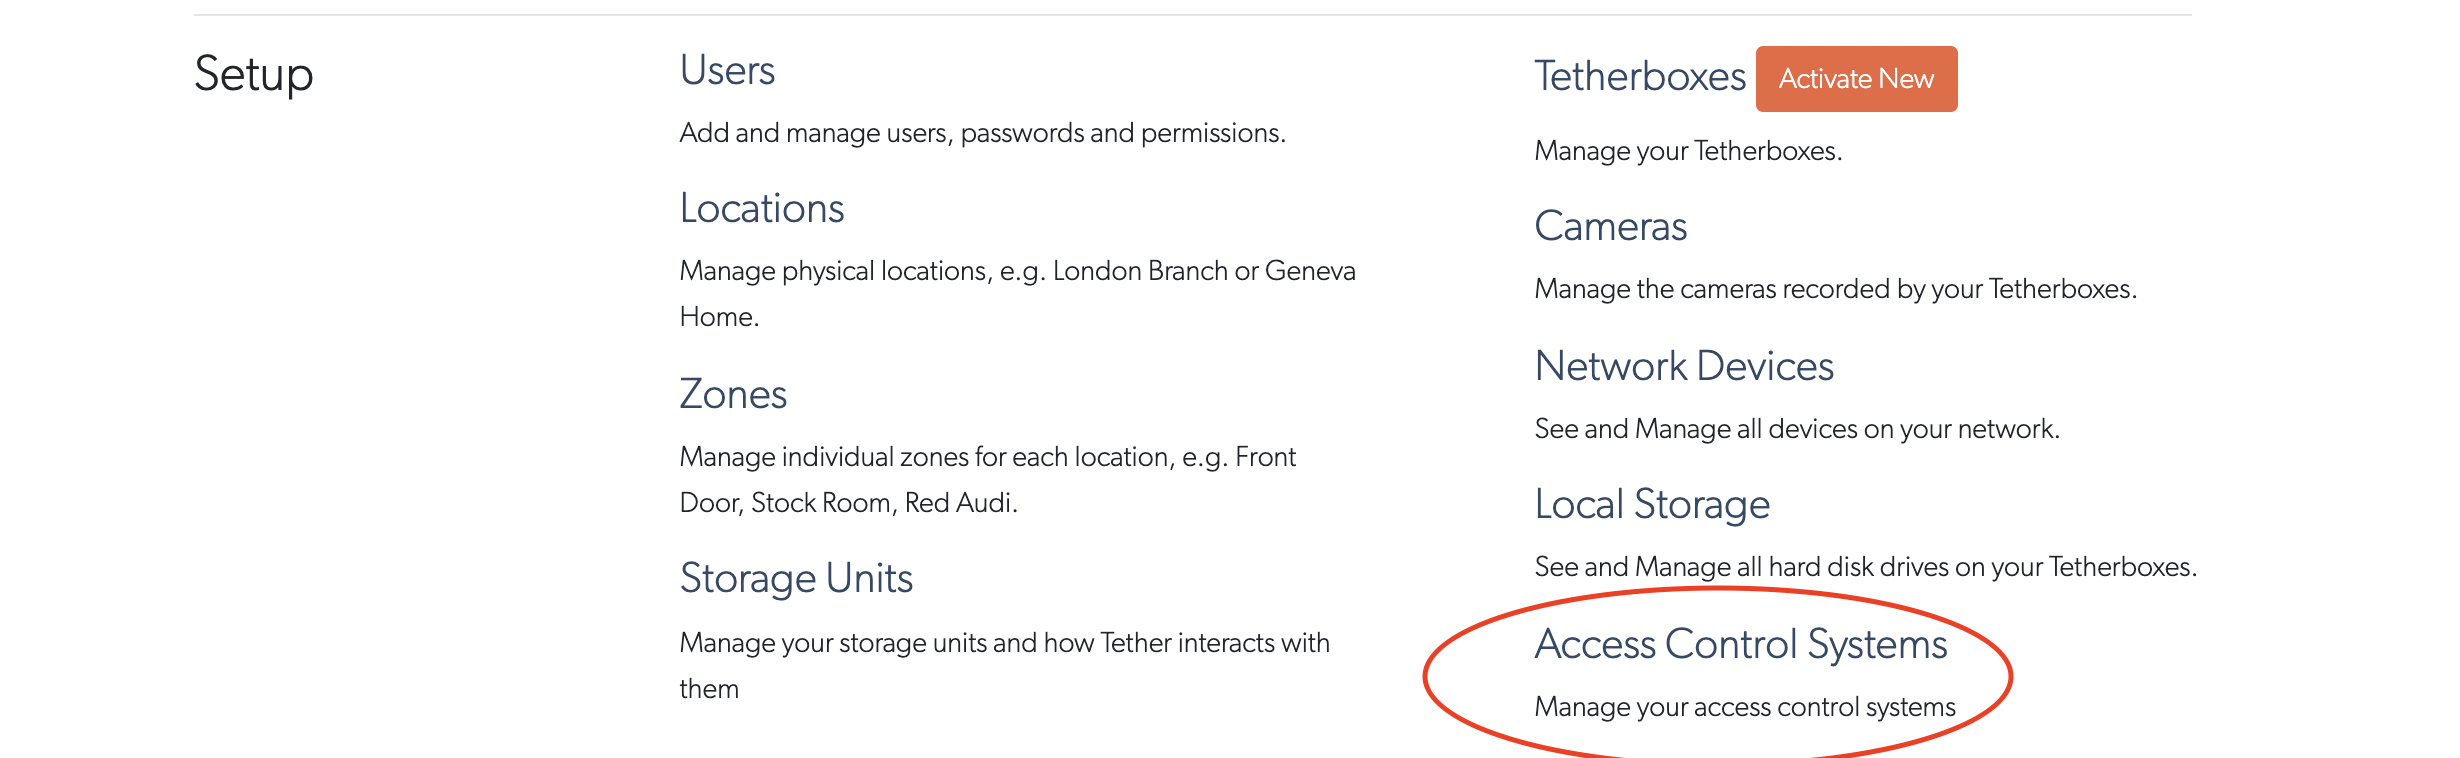
Navigate to Access Control Systems
Go to Admin (top right) → Access Control Systems.
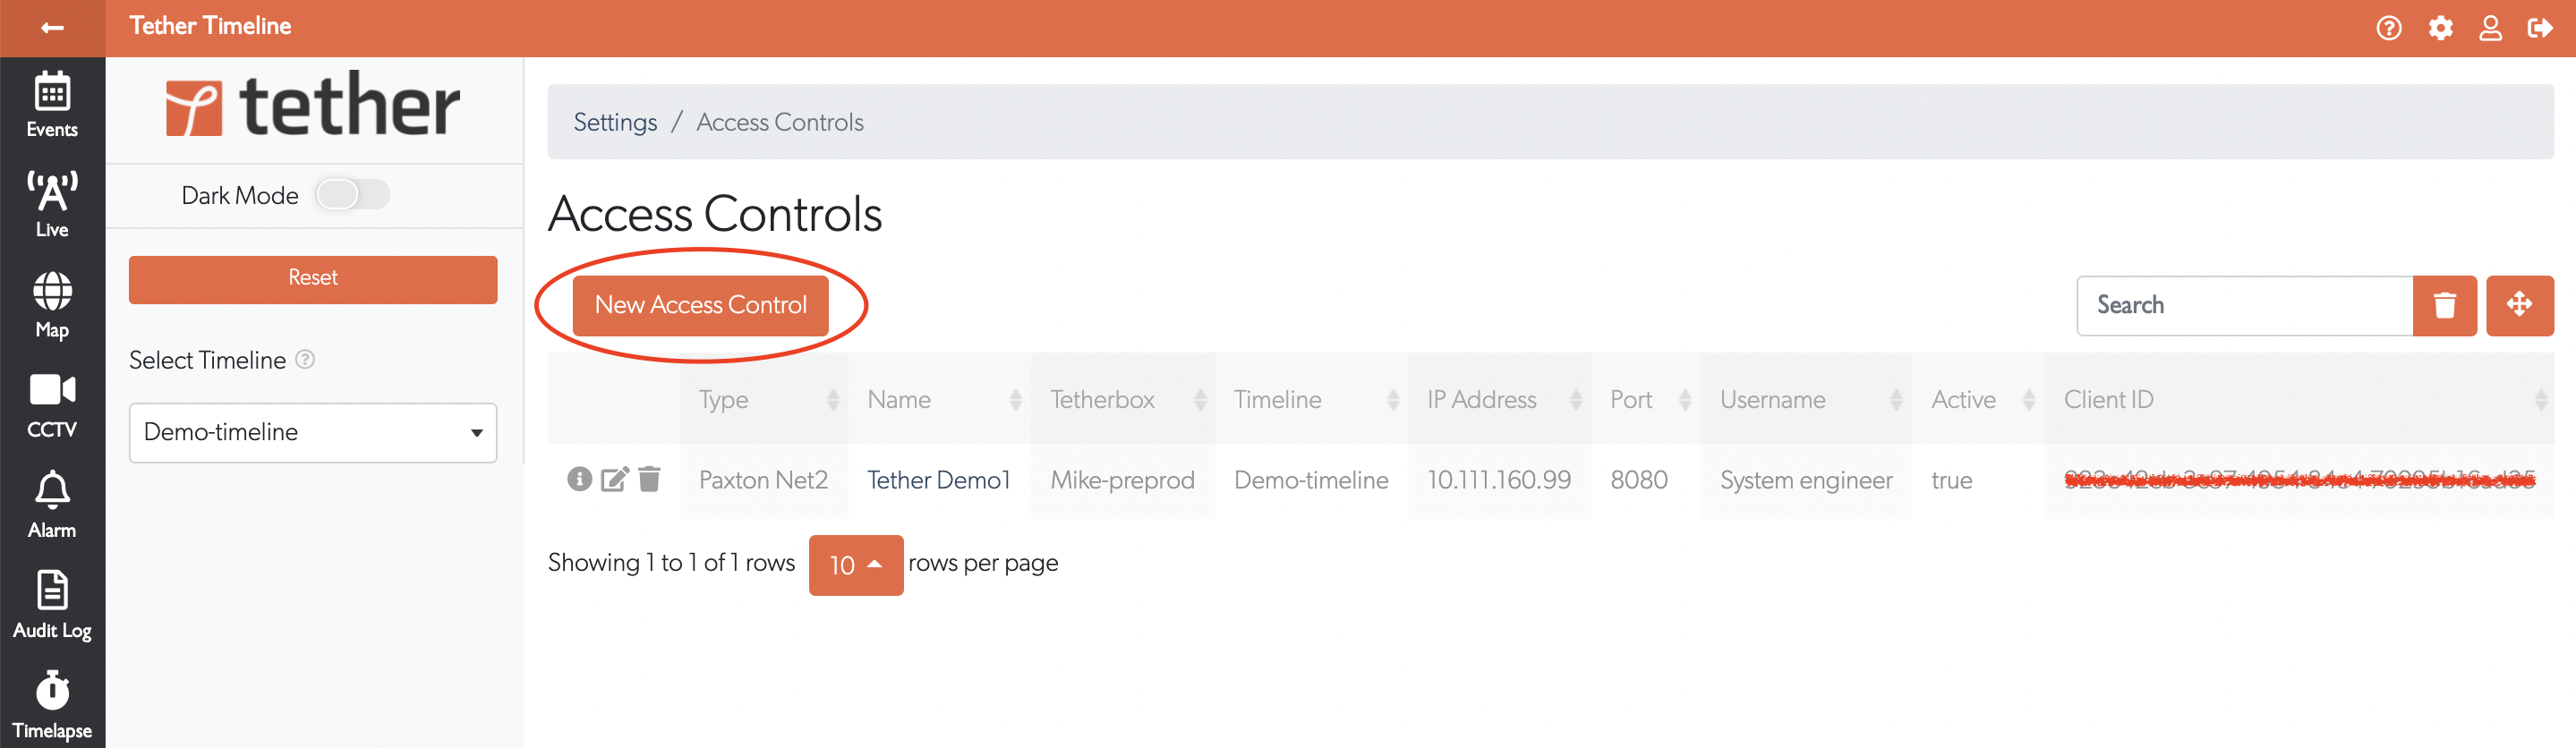
Create New Access Control
Click the New Access Control button.
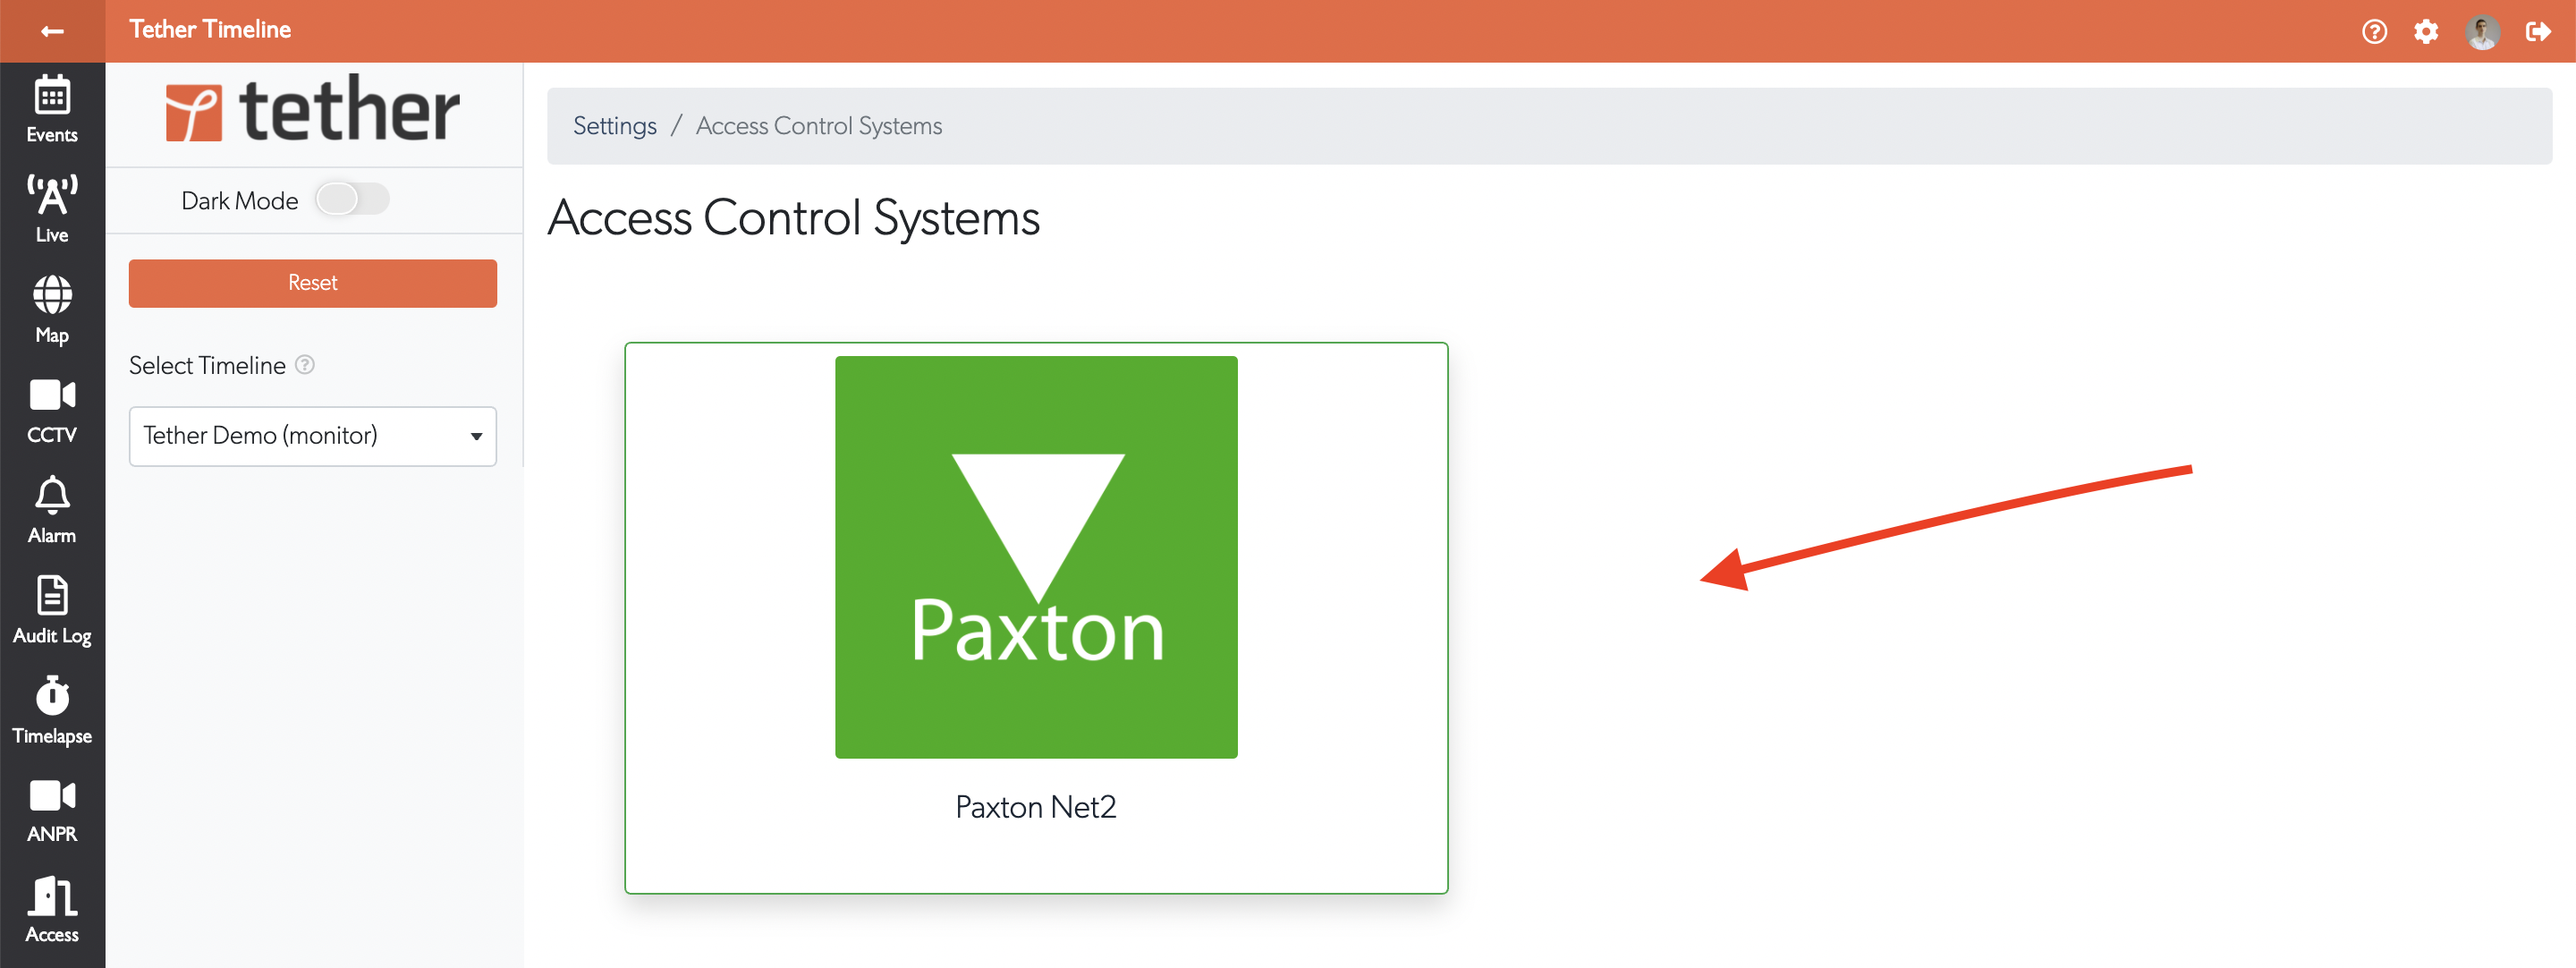
Select Paxton Net2
Select Paxton Net2 as the system type.
Fill in Connection Details
Fill in the required fields:
- Username - Usually "System engineer"
- Password - Your Net2 password
- Port - Usually 8080 or 8443
- IP Address - The Windows machine running Net2 (not the access control units)
Click Create.
Warning: Make sure you have installed the Paxton license before creating the connection.
Using the Integration
Click the information icon to view details about your access control system.
On the Access Control Units tab, assign a camera to each door for visual verification.
Why Link a Camera to a Door?
When you assign a camera to an access control unit, every door event (granted, denied, forced open) is automatically paired with video from that camera. This lets you:
- Verify identity - Confirm who actually used a credential, not just which card was presented
- Investigate incidents - Instantly view footage of any access event without searching by time
- Detect tailgating - See if multiple people entered on a single swipe
- Audit access - Review video evidence alongside access logs
The linked camera doesn't need to be in the same zone - choose whichever camera has the best view of the door.
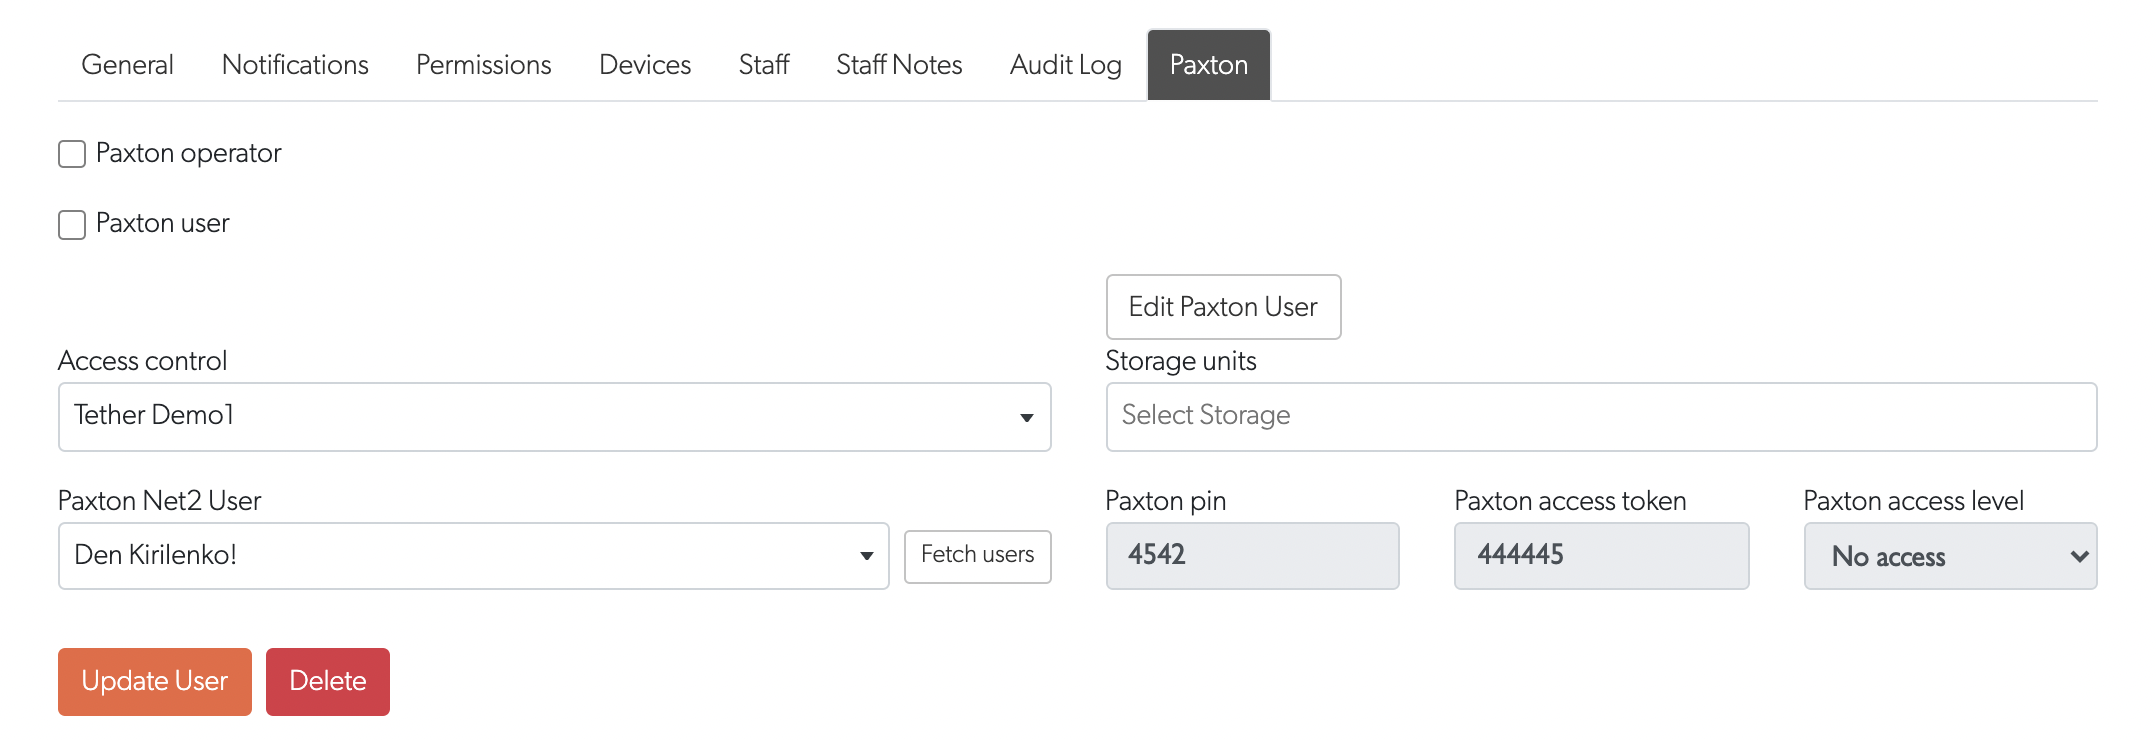
Linking Users
To link a TetherX user to their Paxton access:
- Go to Users and select a user
- Open the Paxton tab
- Select the Access Control and Paxton User
- Click Update User
Viewing Events
Navigate to Access in the left menu to view all access control events.
The graph shows ACU activity and frequency over time. Events are linked to video recordings - click any event to view the associated footage.

Advanced Automation
With Texecom alarm panels, additional automation is available:
- Disarm alarm when a specific Paxton token is used
- Bypass alarm zones using a code on a Paxton keypad
- Send push/email alerts with photos when specific individuals enter
For self-storage sites this drives the whole unmanned workflow: a tenant's swipe bypasses only their own unit's zone and re-arms it on exit. See Self Storage.
Tip: Contact us to discuss advanced integration requirements for your specific use case.
Troubleshooting
API Service Not Running (502 Bad Gateway)
If TetherX cannot connect to Net2, the most common cause is the Net2 API service not running. The Net2 door/access control system runs on a separate service - doors and badge readers continue working even when the API is down.
Symptoms:
- TetherX shows "Unable to connect" or similar errors
- API calls return 502 Bad Gateway
- The Net2 web interface may still load but API features don't work
Solution:
- Open Windows Services (
services.msc) on the Paxton Windows host - Find Net2 OWIN Service (or "Paxton Net2 API Service")
- Restart the service
- If it won't start, also restart the Net2 Server service
Verify API Status in Net2 Configuration Utility
If restarting services doesn't help:
- Open the Net2 Server Configuration Utility
- Go to the Security tab
- Click Enable Local API (if not already enabled)
- Click Service Controller to open the API Configuration Utility
- Verify Local API Status shows "Running" (green)
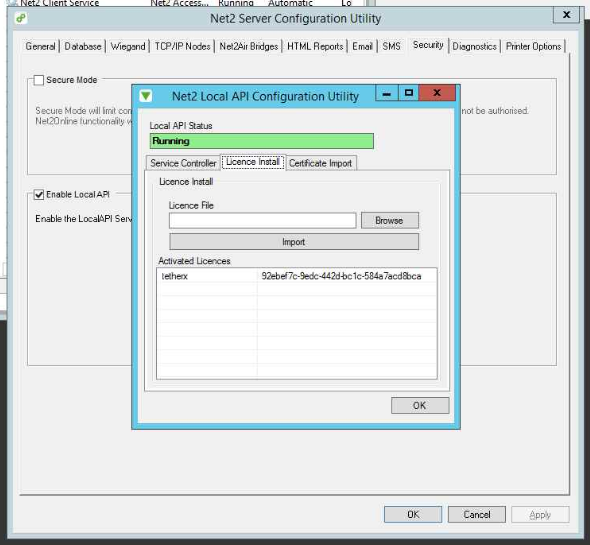
Verify License Installation
If the API status shows an error:
- In the API Configuration Utility, click the Licence Install tab
- Verify the TetherX licence appears under Activated Licences
- The Client ID should be:
92ebef7c-9edc-442d-bc1c-584a7acd8bca - If missing, re-import the license file from the ApiLicences folder
Tip: The license file should exist at: C:\Program Files (x86)\Paxton Access\Access Control\ApiLicences\92ebef7c-9edc-442d-bc1c-584a7acd8bca.lic
Connection Still Failing?
If the above steps don't resolve the issue:
- Verify the Net2 server PC has network connectivity to your TetherBox
- Check Windows Firewall isn't blocking port 8443 (or your configured port)
- Ensure you're using the correct IP address of the Windows PC running Net2
- Contact us with your TetherBox serial number for remote diagnostics
Referenced in: