Table of Contents
Texecom Integration
TetherX integrates with Texecom Veritas, Premier, and Elite alarm panels via a USB-COM serial connection. This provides the deepest integration with real-time zone status, remote arming/disarming, and virtual keypad control.
Alternative: IP Communicator
If you have an IP communicator module fitted, you can use Alarm Integration (SIA/ContactID) instead of serial. This method works with Texecom and many other alarm panels including Honeywell Galaxy, DSC PowerSeries, Bosch, and any panel with SIA DC-09 or Contact ID support.
IP communicator integration is simpler to set up (no USB cable required) but provides event notifications only - not real-time zone status or remote control. Choose serial integration if you need the full feature set described below.
Why Connect via Serial?
Integrating your Texecom alarm with TetherX provides powerful capabilities:
- Visual verification - See camera footage alongside alarm events to verify genuine activations vs false alarms.
- Push notifications - Receive instant alerts on your phone with images from your cameras when zones trigger.
- Remote zone bypass - Bypass malfunctioning zones directly from TetherX without needing to disarm your entire alarm.
- Centralised management - Manage all your Texecom sites from a single platform, regardless of location. Replace multiple manufacturer apps with one unified interface.
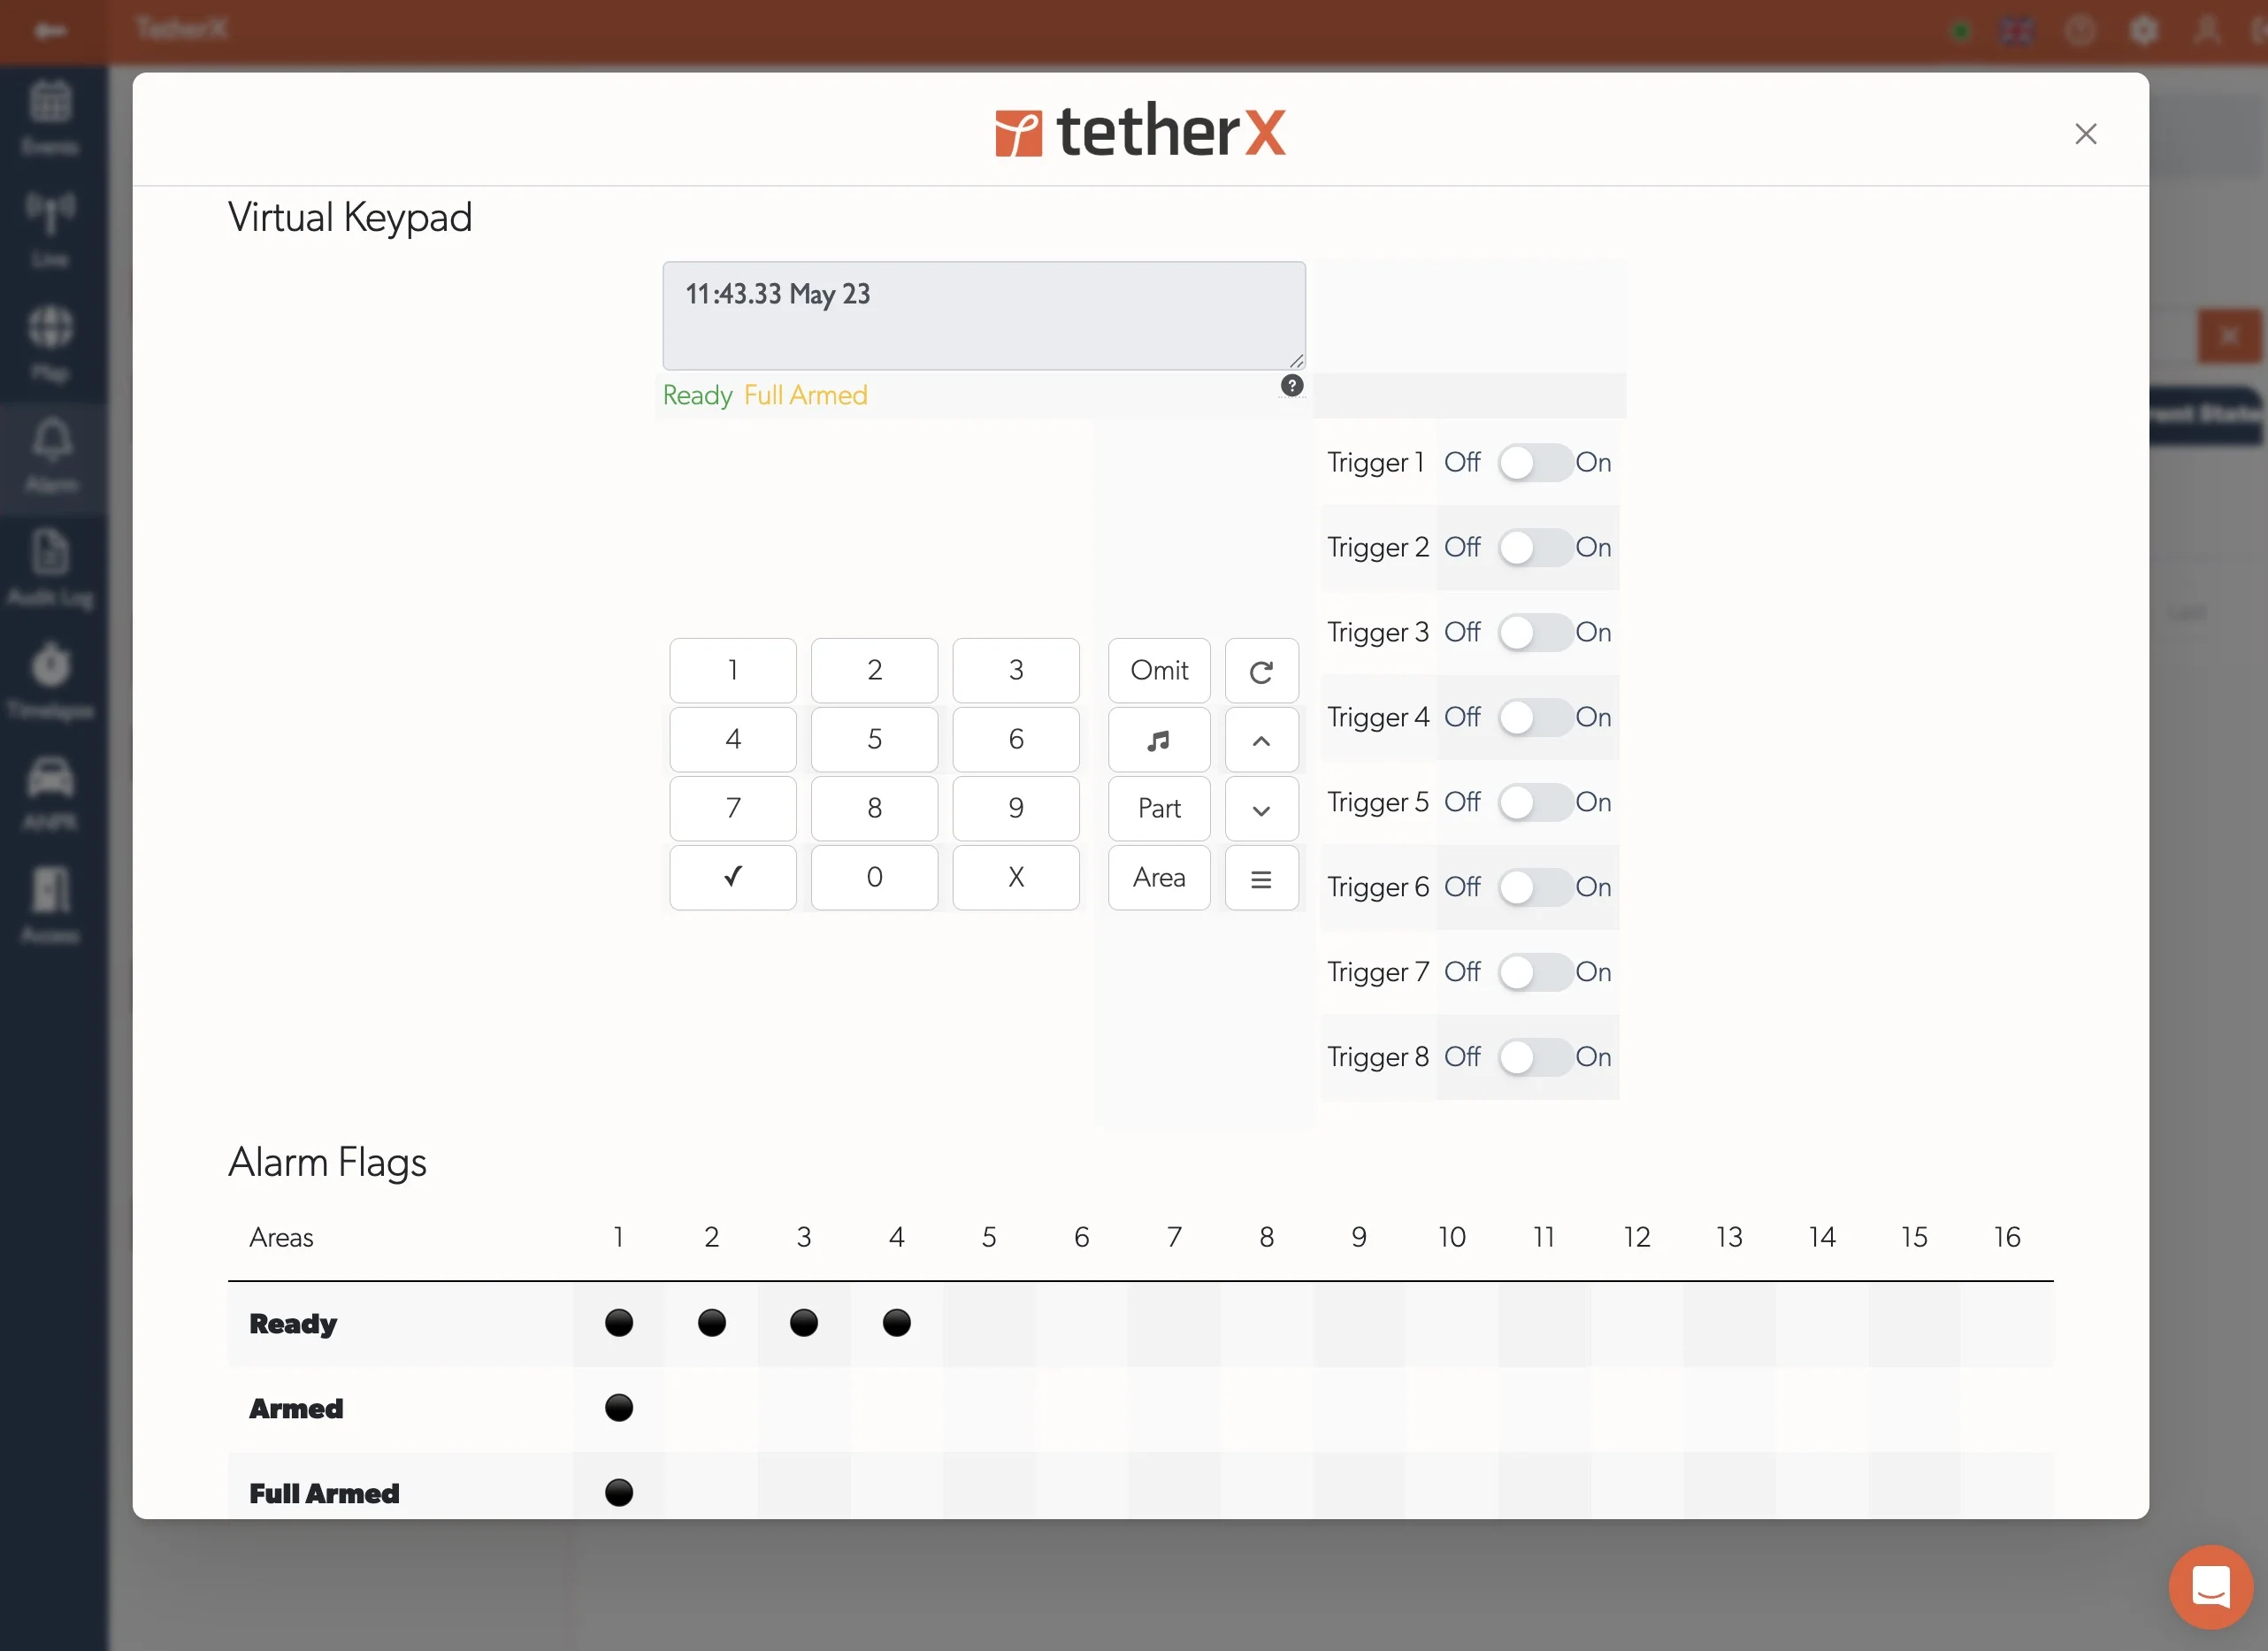
- Virtual keypad - Arm, disarm, and control your alarm remotely through TetherX.
- Smart automation - Create rules that link alarm events to cameras, notifications, and other actions.
Requirements
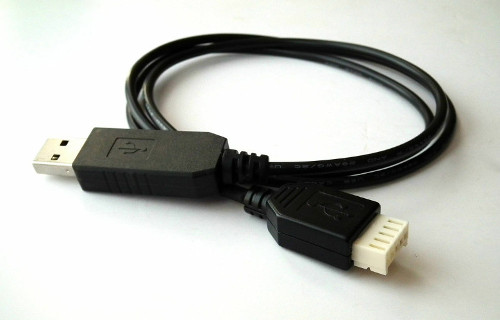
- Texecom USB-COM Interface Connector (JAC-0001)
- TetherBox with available USB port
Warning: Texecom SmartCom is not currently supported.
Step 1: Connect Texecom to TetherBox
Install the Texecom Elite panel as per the Premier Elite Series Installation Manual.
USB-COM Cable
Use the Texecom USB-COM Interface Connector (JAC-0001):
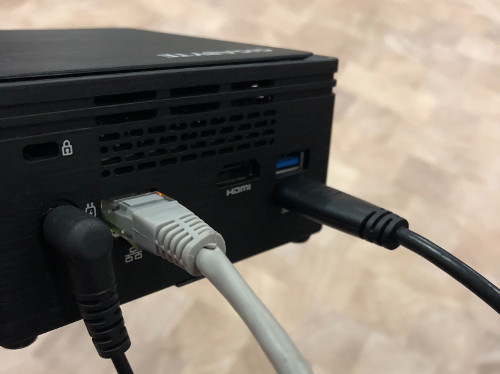
Connect to TetherBox
Connect the USB end of the cable to an available USB port on your TetherBox:
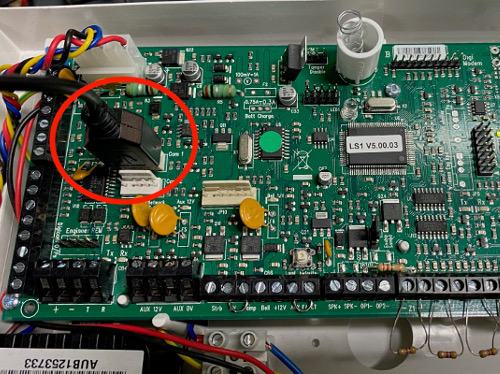
Connect to Texecom Panel
Connect the serial end to the COM2 port on the Texecom panel (highlighted in red):
Step 2: Configure the Serial Connection
Before connecting to TetherX, configure the Texecom panel using Wintex software.
Install Wintex
Download and install Wintex from the Texecom website.
Install the USB-COM driver as per the USB-COM installation instructions.
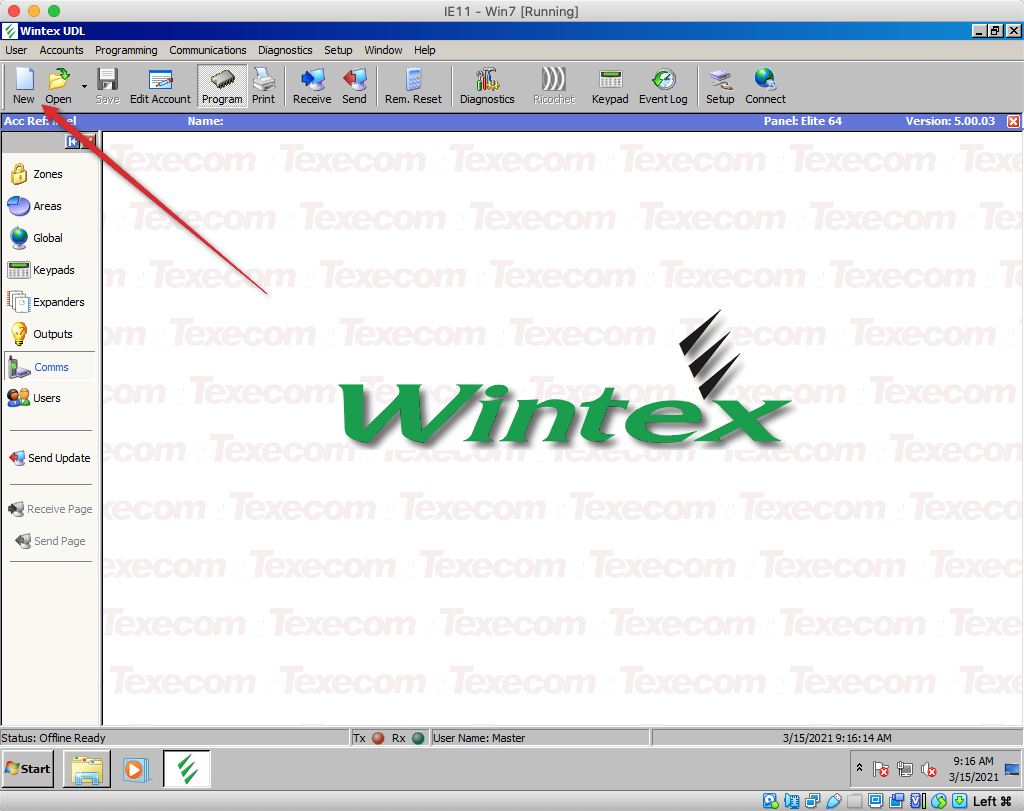
Create Account Profile
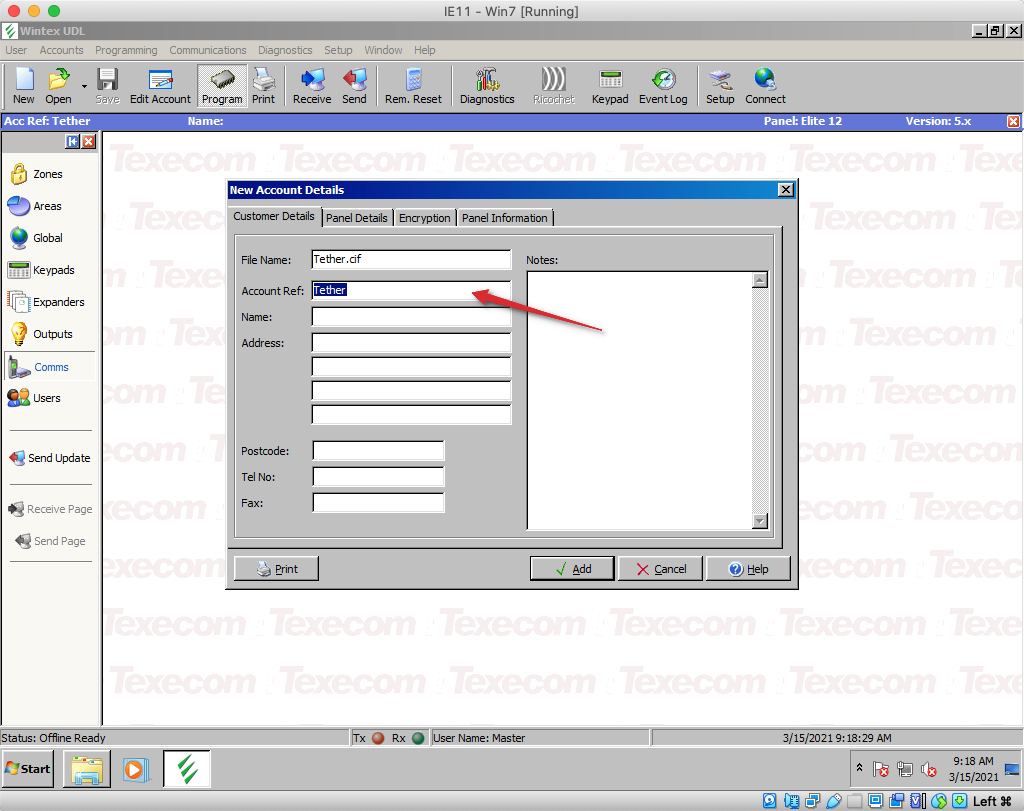
Open Wintex and click New to create a new account profile:
Fill in the account details for this panel:
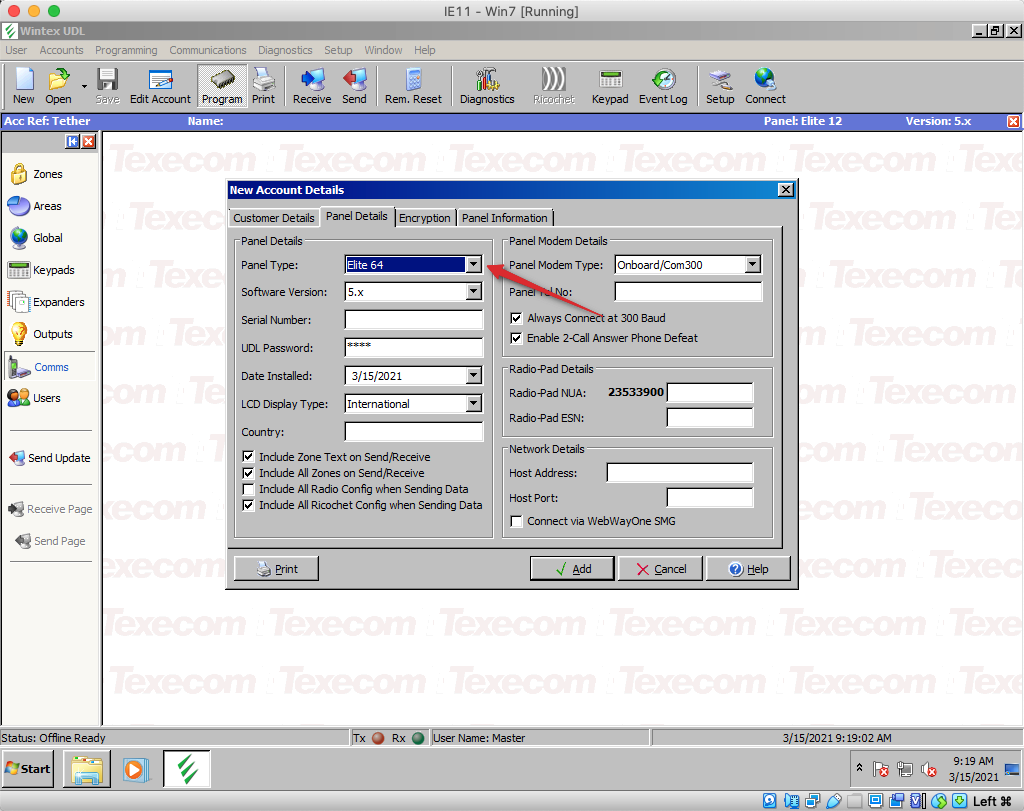
Select Panel Type
Select the correct alarm panel type (e.g., Elite 64):
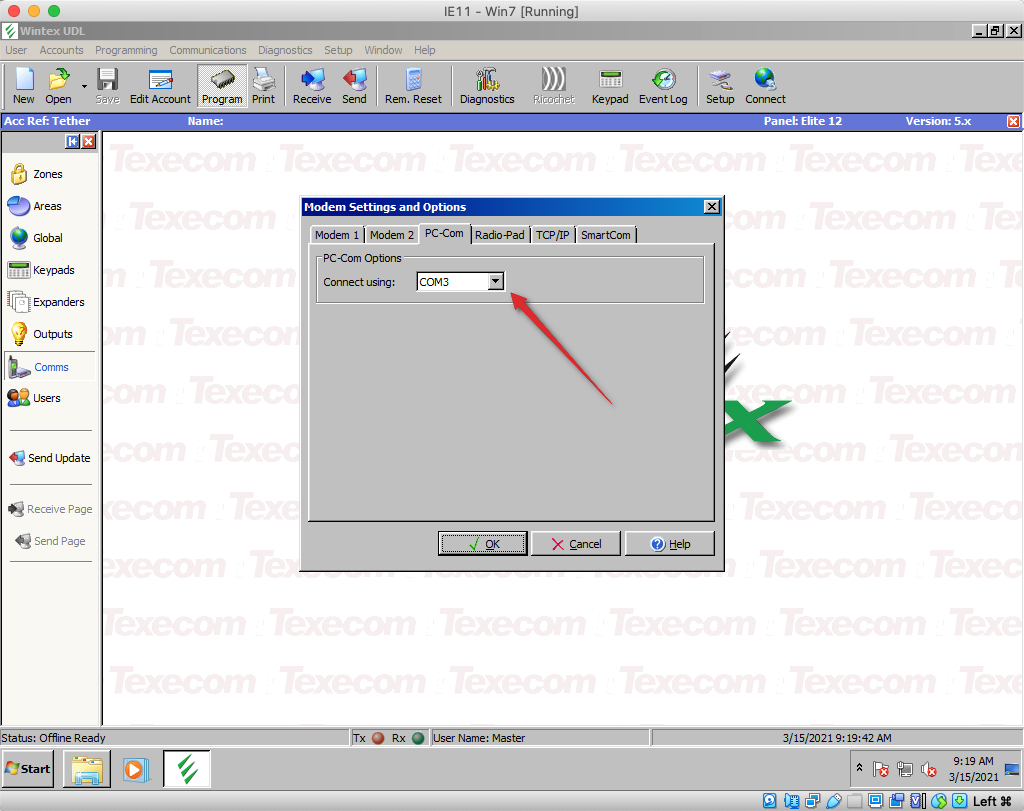
Select COM Port
Choose the virtual USB-COM port number connected to the alarm panel:
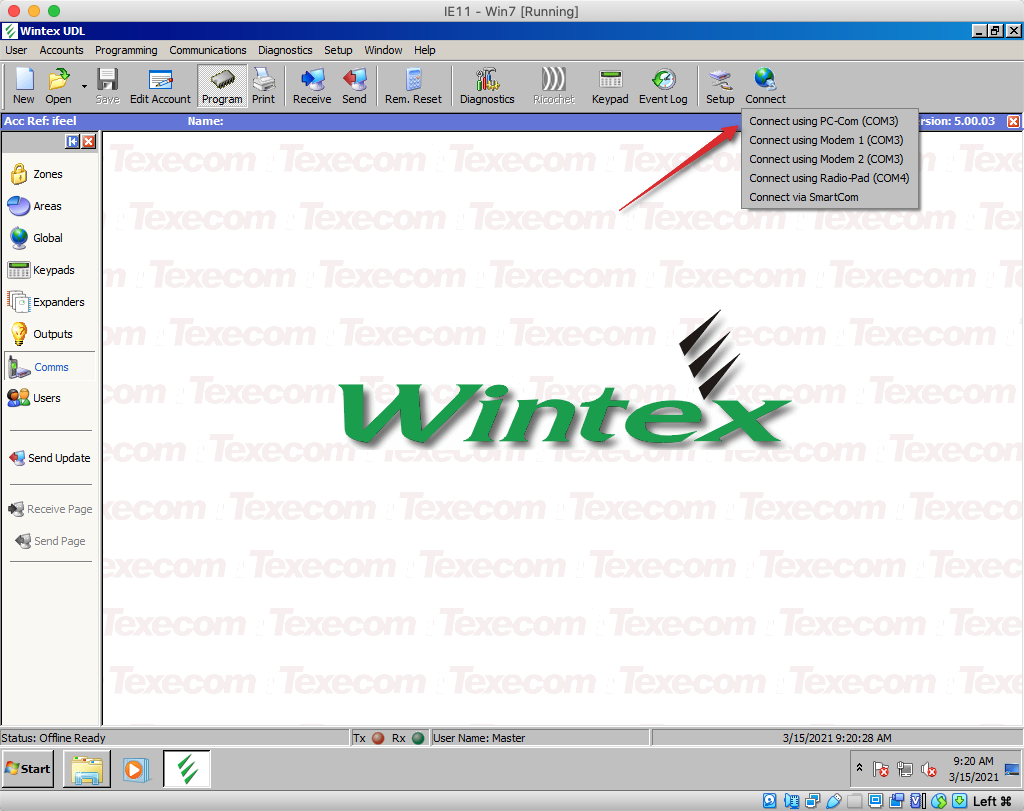
Connect to Panel
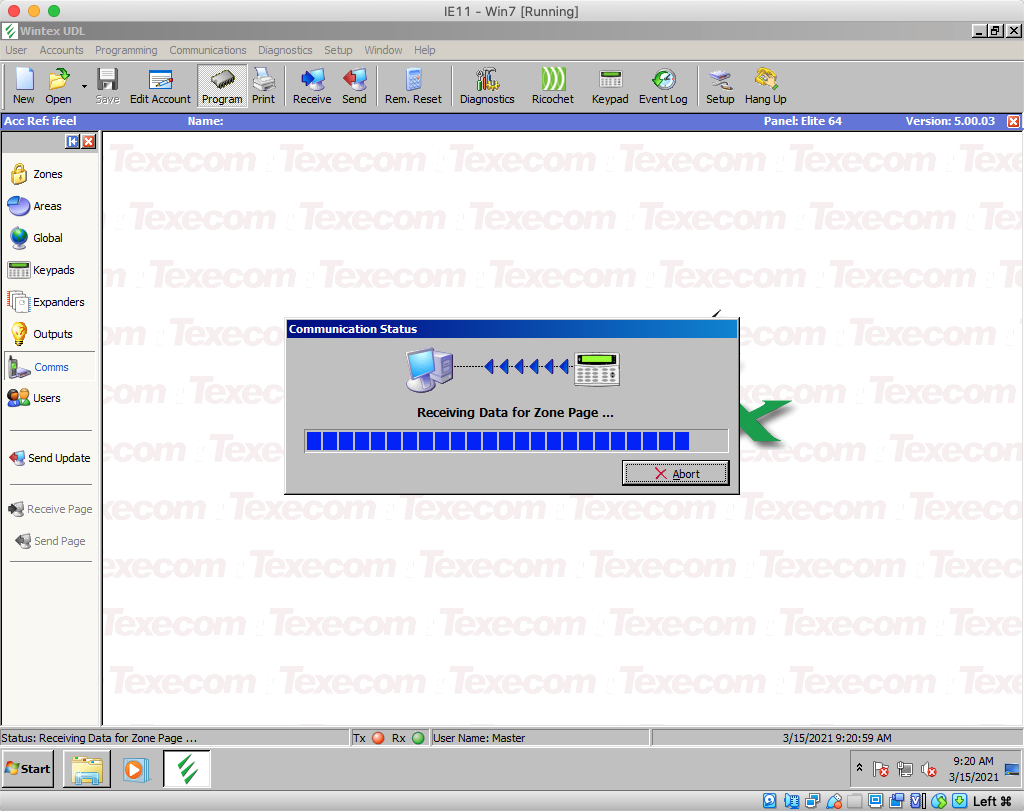
Click Connect using PC-COM to establish communication:
Wintex will receive the current settings from the alarm panel:
Configure Communicator
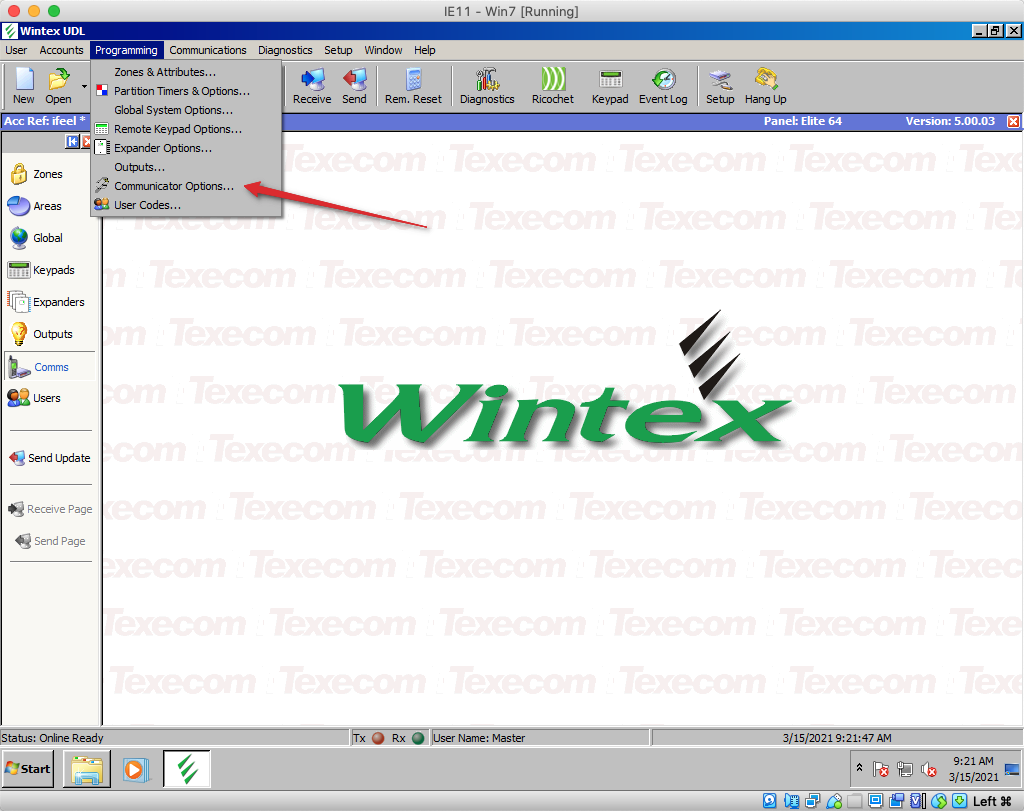
Open Programming > Communicator Options:
Set the UDL Passcode (e.g., 1234) and tick Enable Communicator:
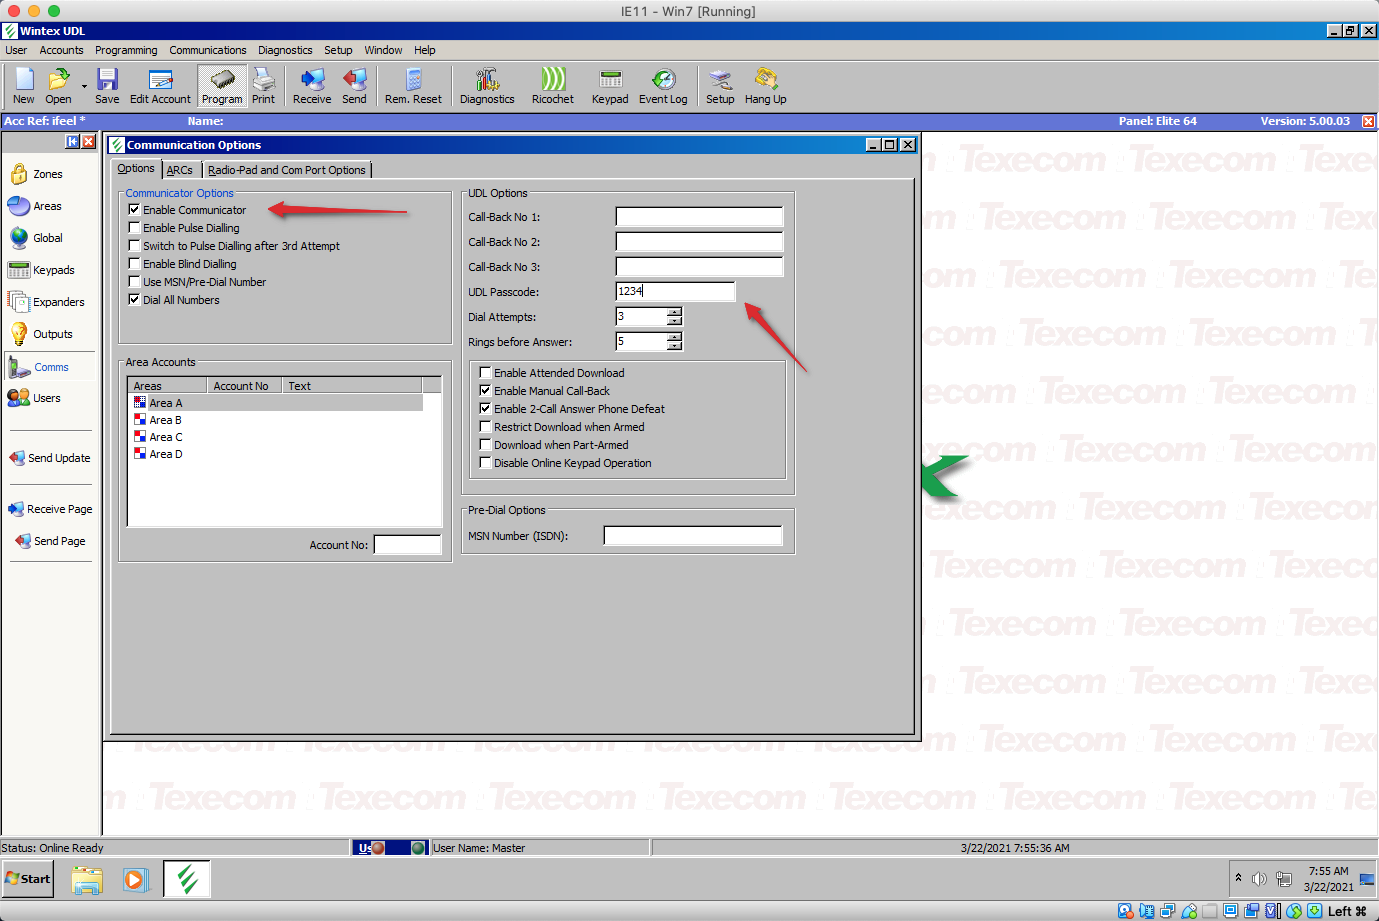
Warning: Note this passcode - you will need it when adding the alarm to TetherX. Entering the wrong passcode three times will lock the panel.
Configure COM2 Settings
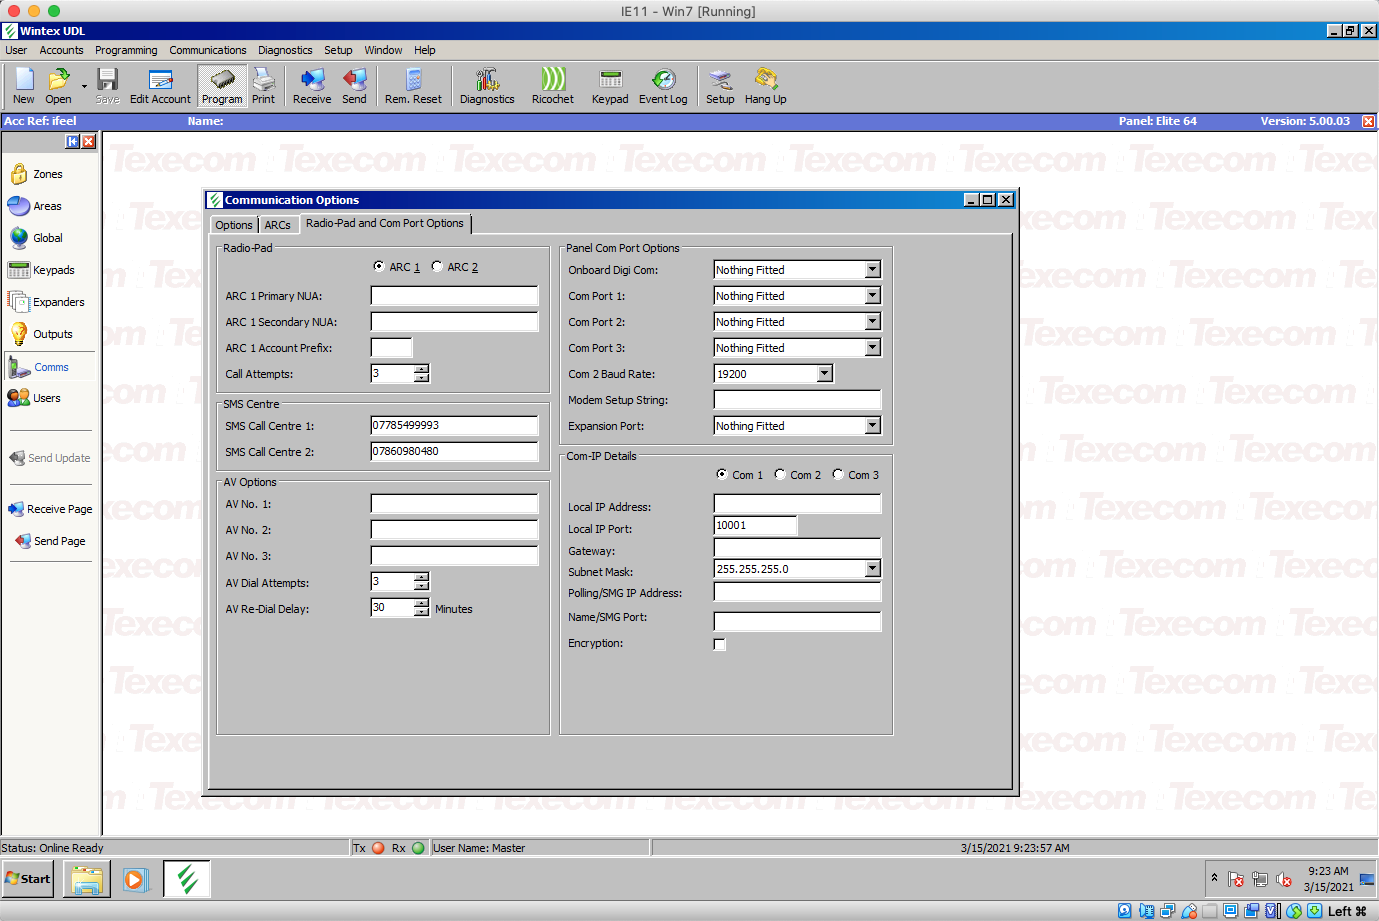
Go to the Radio-Pad and Com Port Options tab. Set COM2 Baud Rate to 19200 and all COM ports to Nothing Fitted:
Send Configuration
Click Send Update to send the configuration to the panel, then disconnect:

Step 3: Add the Alarm to TetherX
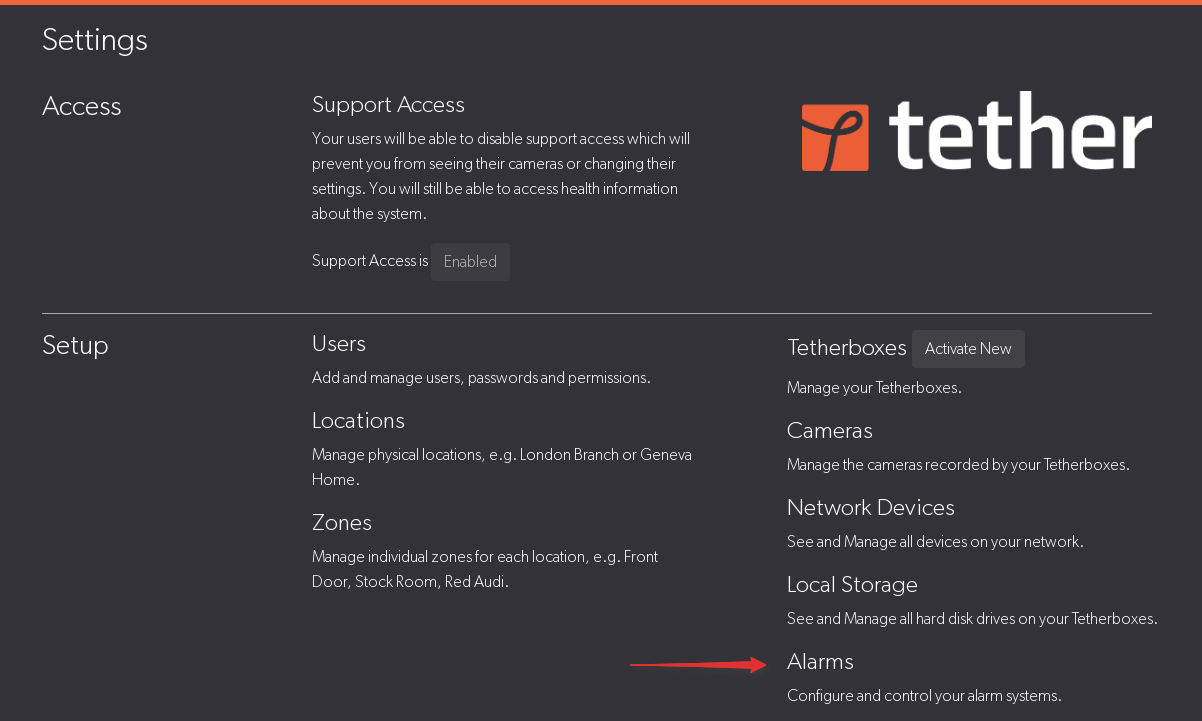
Navigate to Admin > Alarms:
Click New Alarm and configure:
- Name - A descriptive name for this panel
- TetherBox - Select the TetherBox the panel is connected to
- Alarm Type - Select Texecom Elite (or appropriate model)
- UDL Password - Enter the UDL passcode configured in Wintex
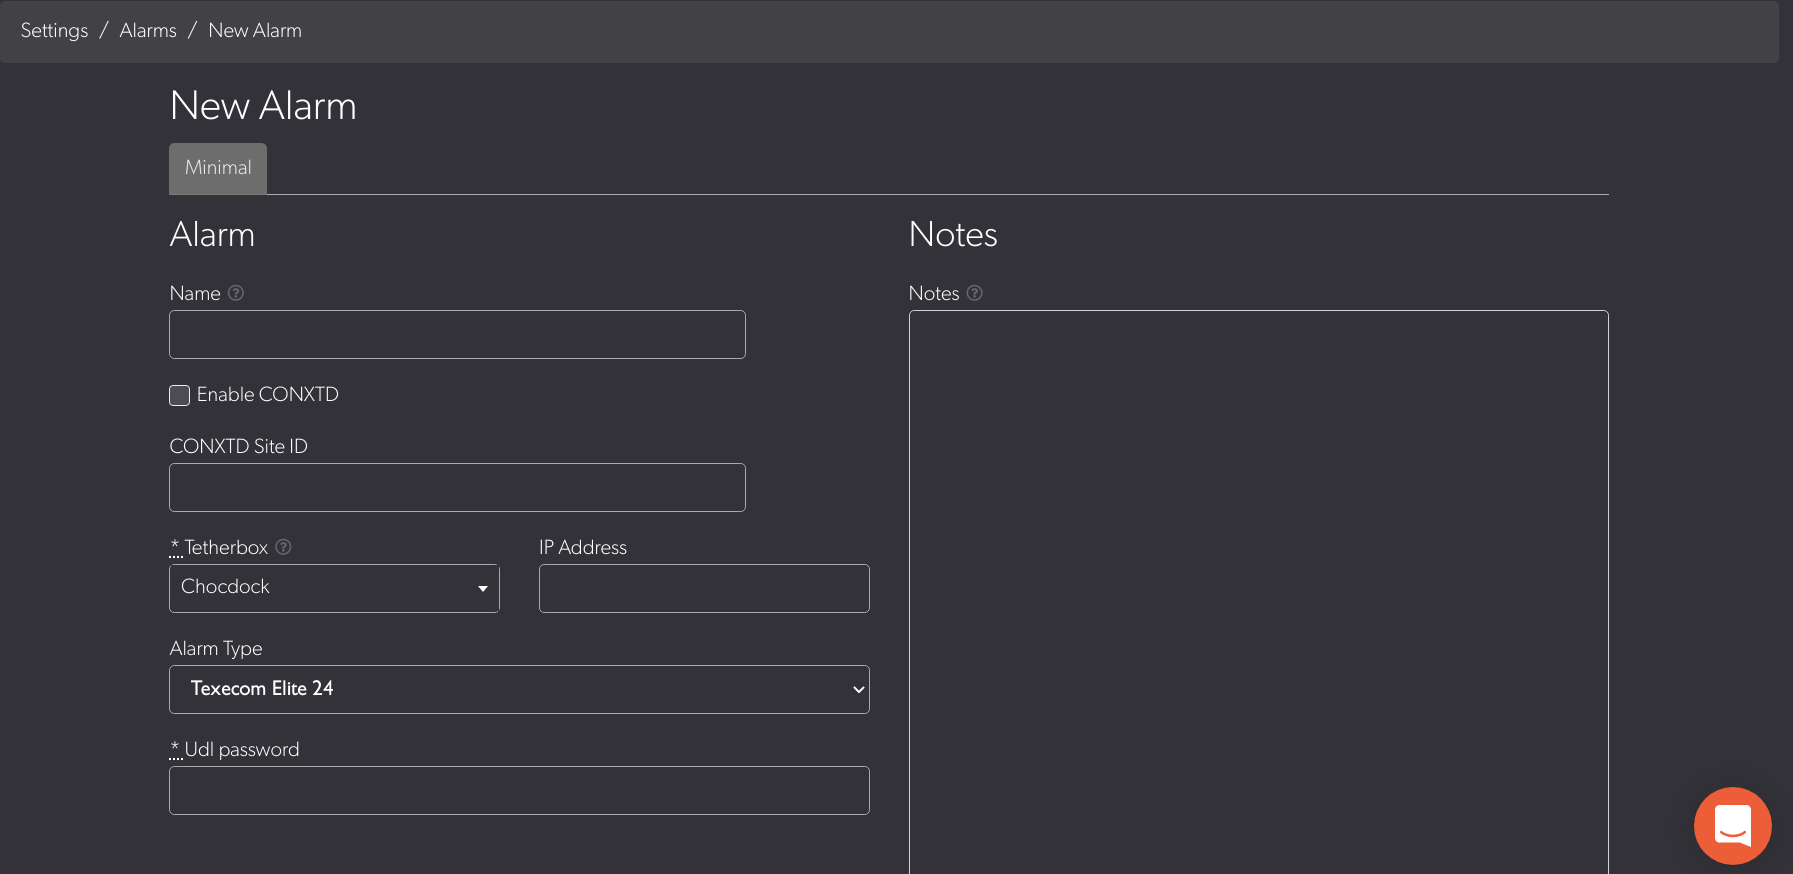
Click Create.
Verify Connection
The TetherBox will connect to the panel. Make sure the alarm shows as Active (toggle should be on):
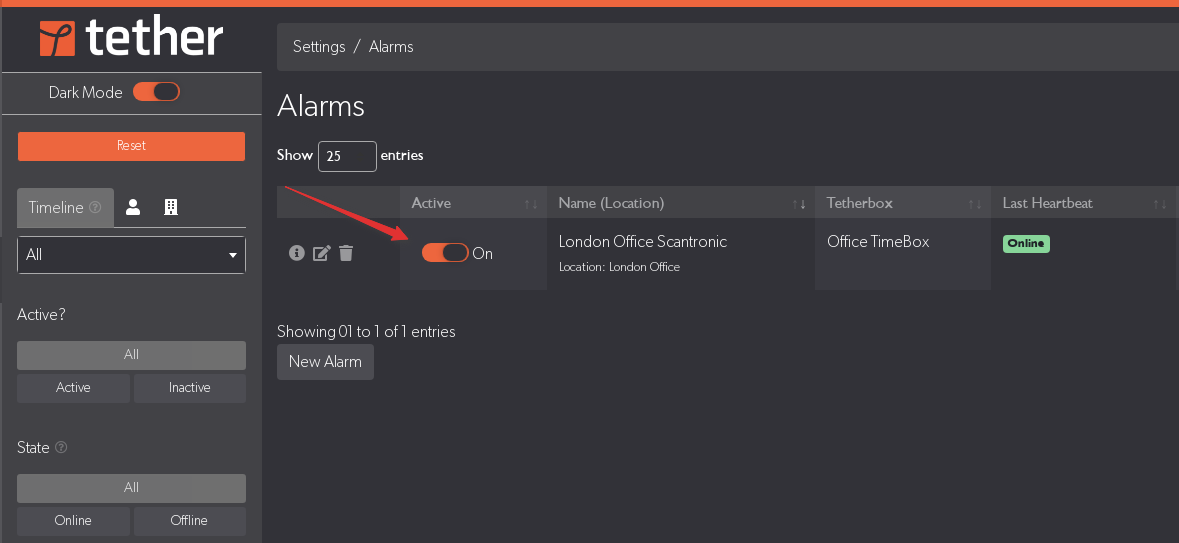
Once active, you can:
- View alarm status in near real-time
- Receive email and push notifications for alarm activations
- Link cameras to alarm zones
- Use the virtual keypad to remotely manage the alarm
UDL Lockout Recovery
If the wrong UDL passcode is entered more than three times, the panel enters a UDL lockout state. From the Texecom manual:
18 - UDL Lockout: This output type activates when an attempt is made to upload/download with incorrect site details more than three times and deactivates after 4 hours or after a valid User code is entered.
To reset the UDL lockout:
- Disconnect both mains power and battery from the alarm panel
- Reconnect power to reboot the panel
- Verify the correct UDL passcode is configured in TetherX before reactivating
Tip: Always verify the UDL passcode is correct in TetherX before activating the alarm connection to avoid lockouts.
Resources
- Premier Elite Series Installation Manual
- Premier Elite Quick Reference Guide
- USB-COM Installation Instructions
- Texecom Software Downloads
Related Articles
- Paxton Net2 Integration - link access control to alarm zones for per-user disarm
- Self Storage - per-unit zone bypass driven by access in an unmanned storage site
Referenced in: